Making your own plush: 2D plush

Techniques, Uncategorized

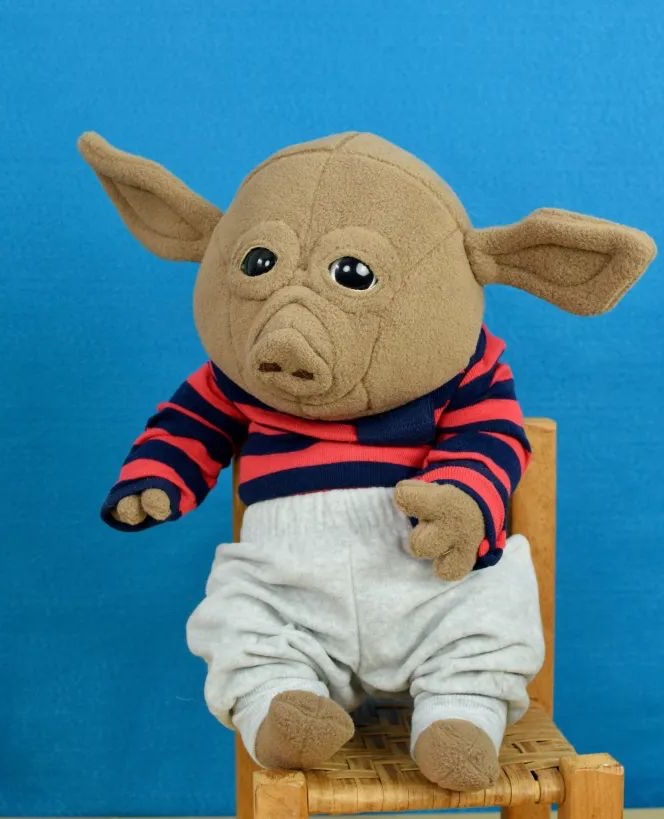
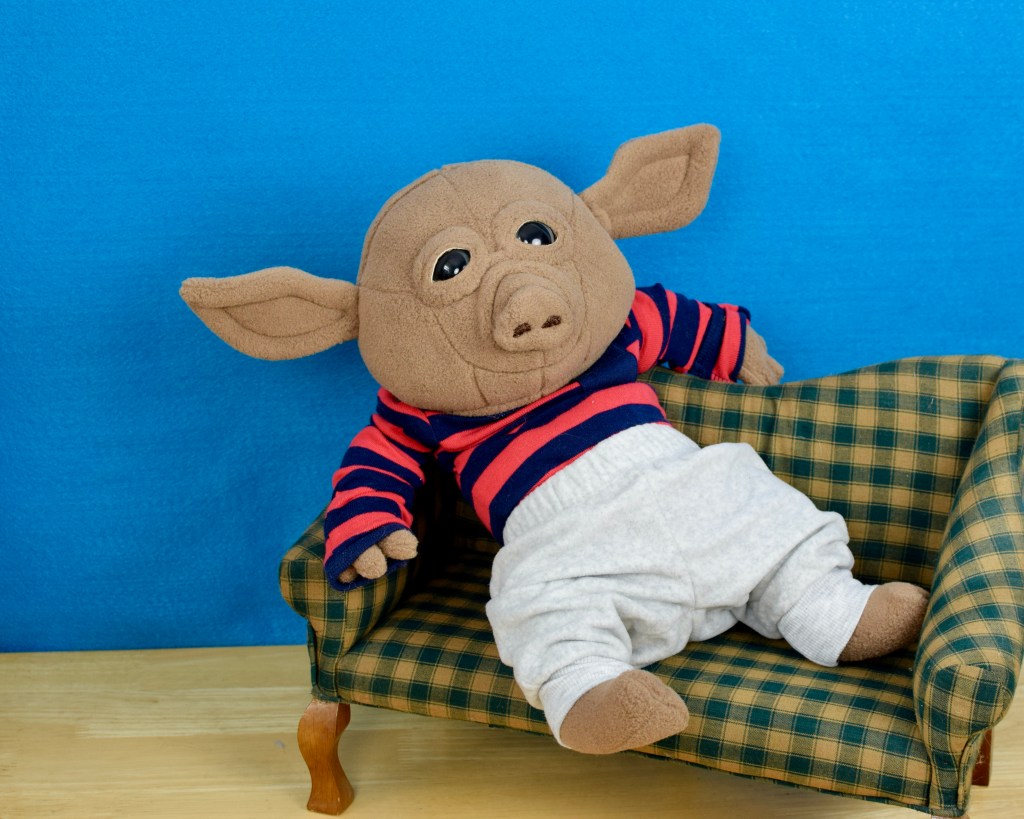
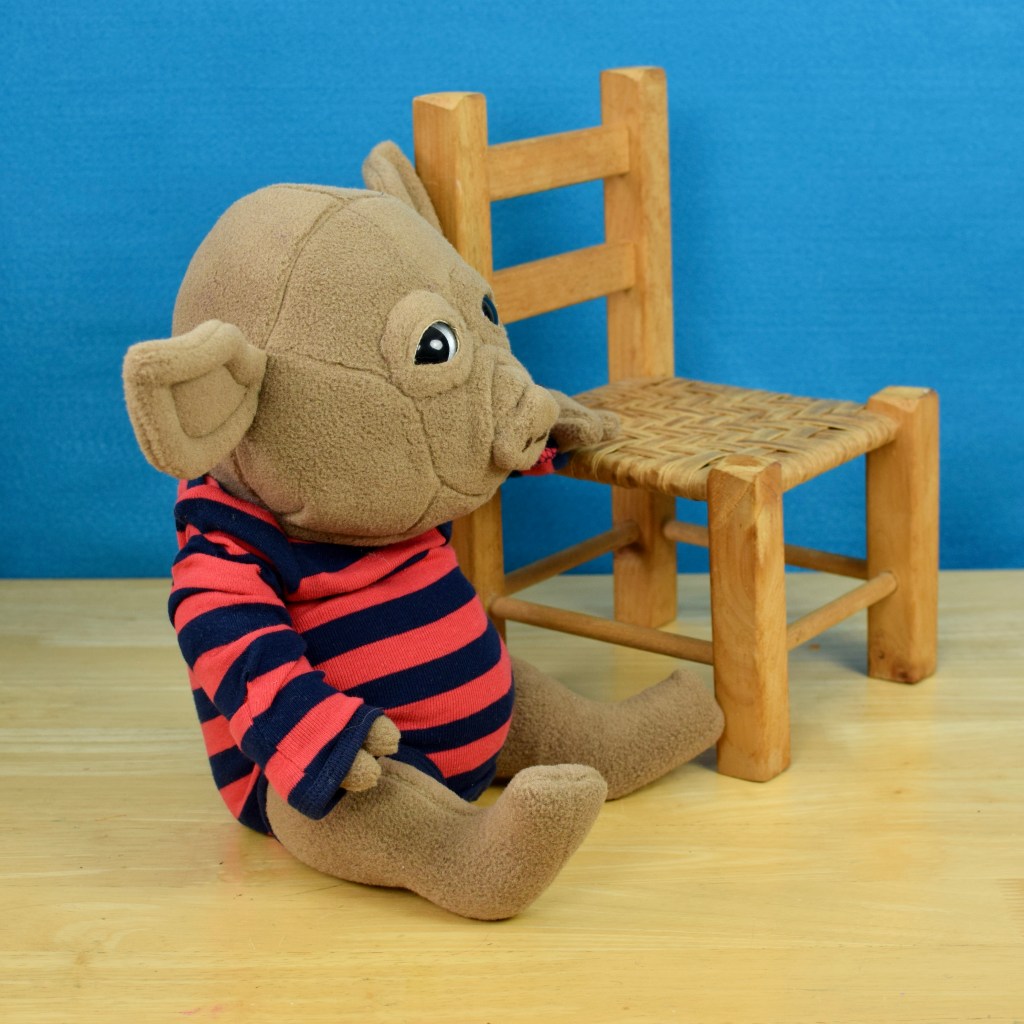
I have spent the last six years obsessed with learning how to make patterns to sew my own dolls and soft toys, and I had spent the ten or so years prior to that learning how to make my own patterns for women’s clothing. The method I primarily use is called flat pattern drafting and it helps you make three dimensional, sculptural plush (like most of the stuffed animals that you might see in the stores). I will be offering trainings on this topic soon. However, I want to spend some time on some basic concepts that don’t really require this knowledge, and one of those is what I call 2D plush.

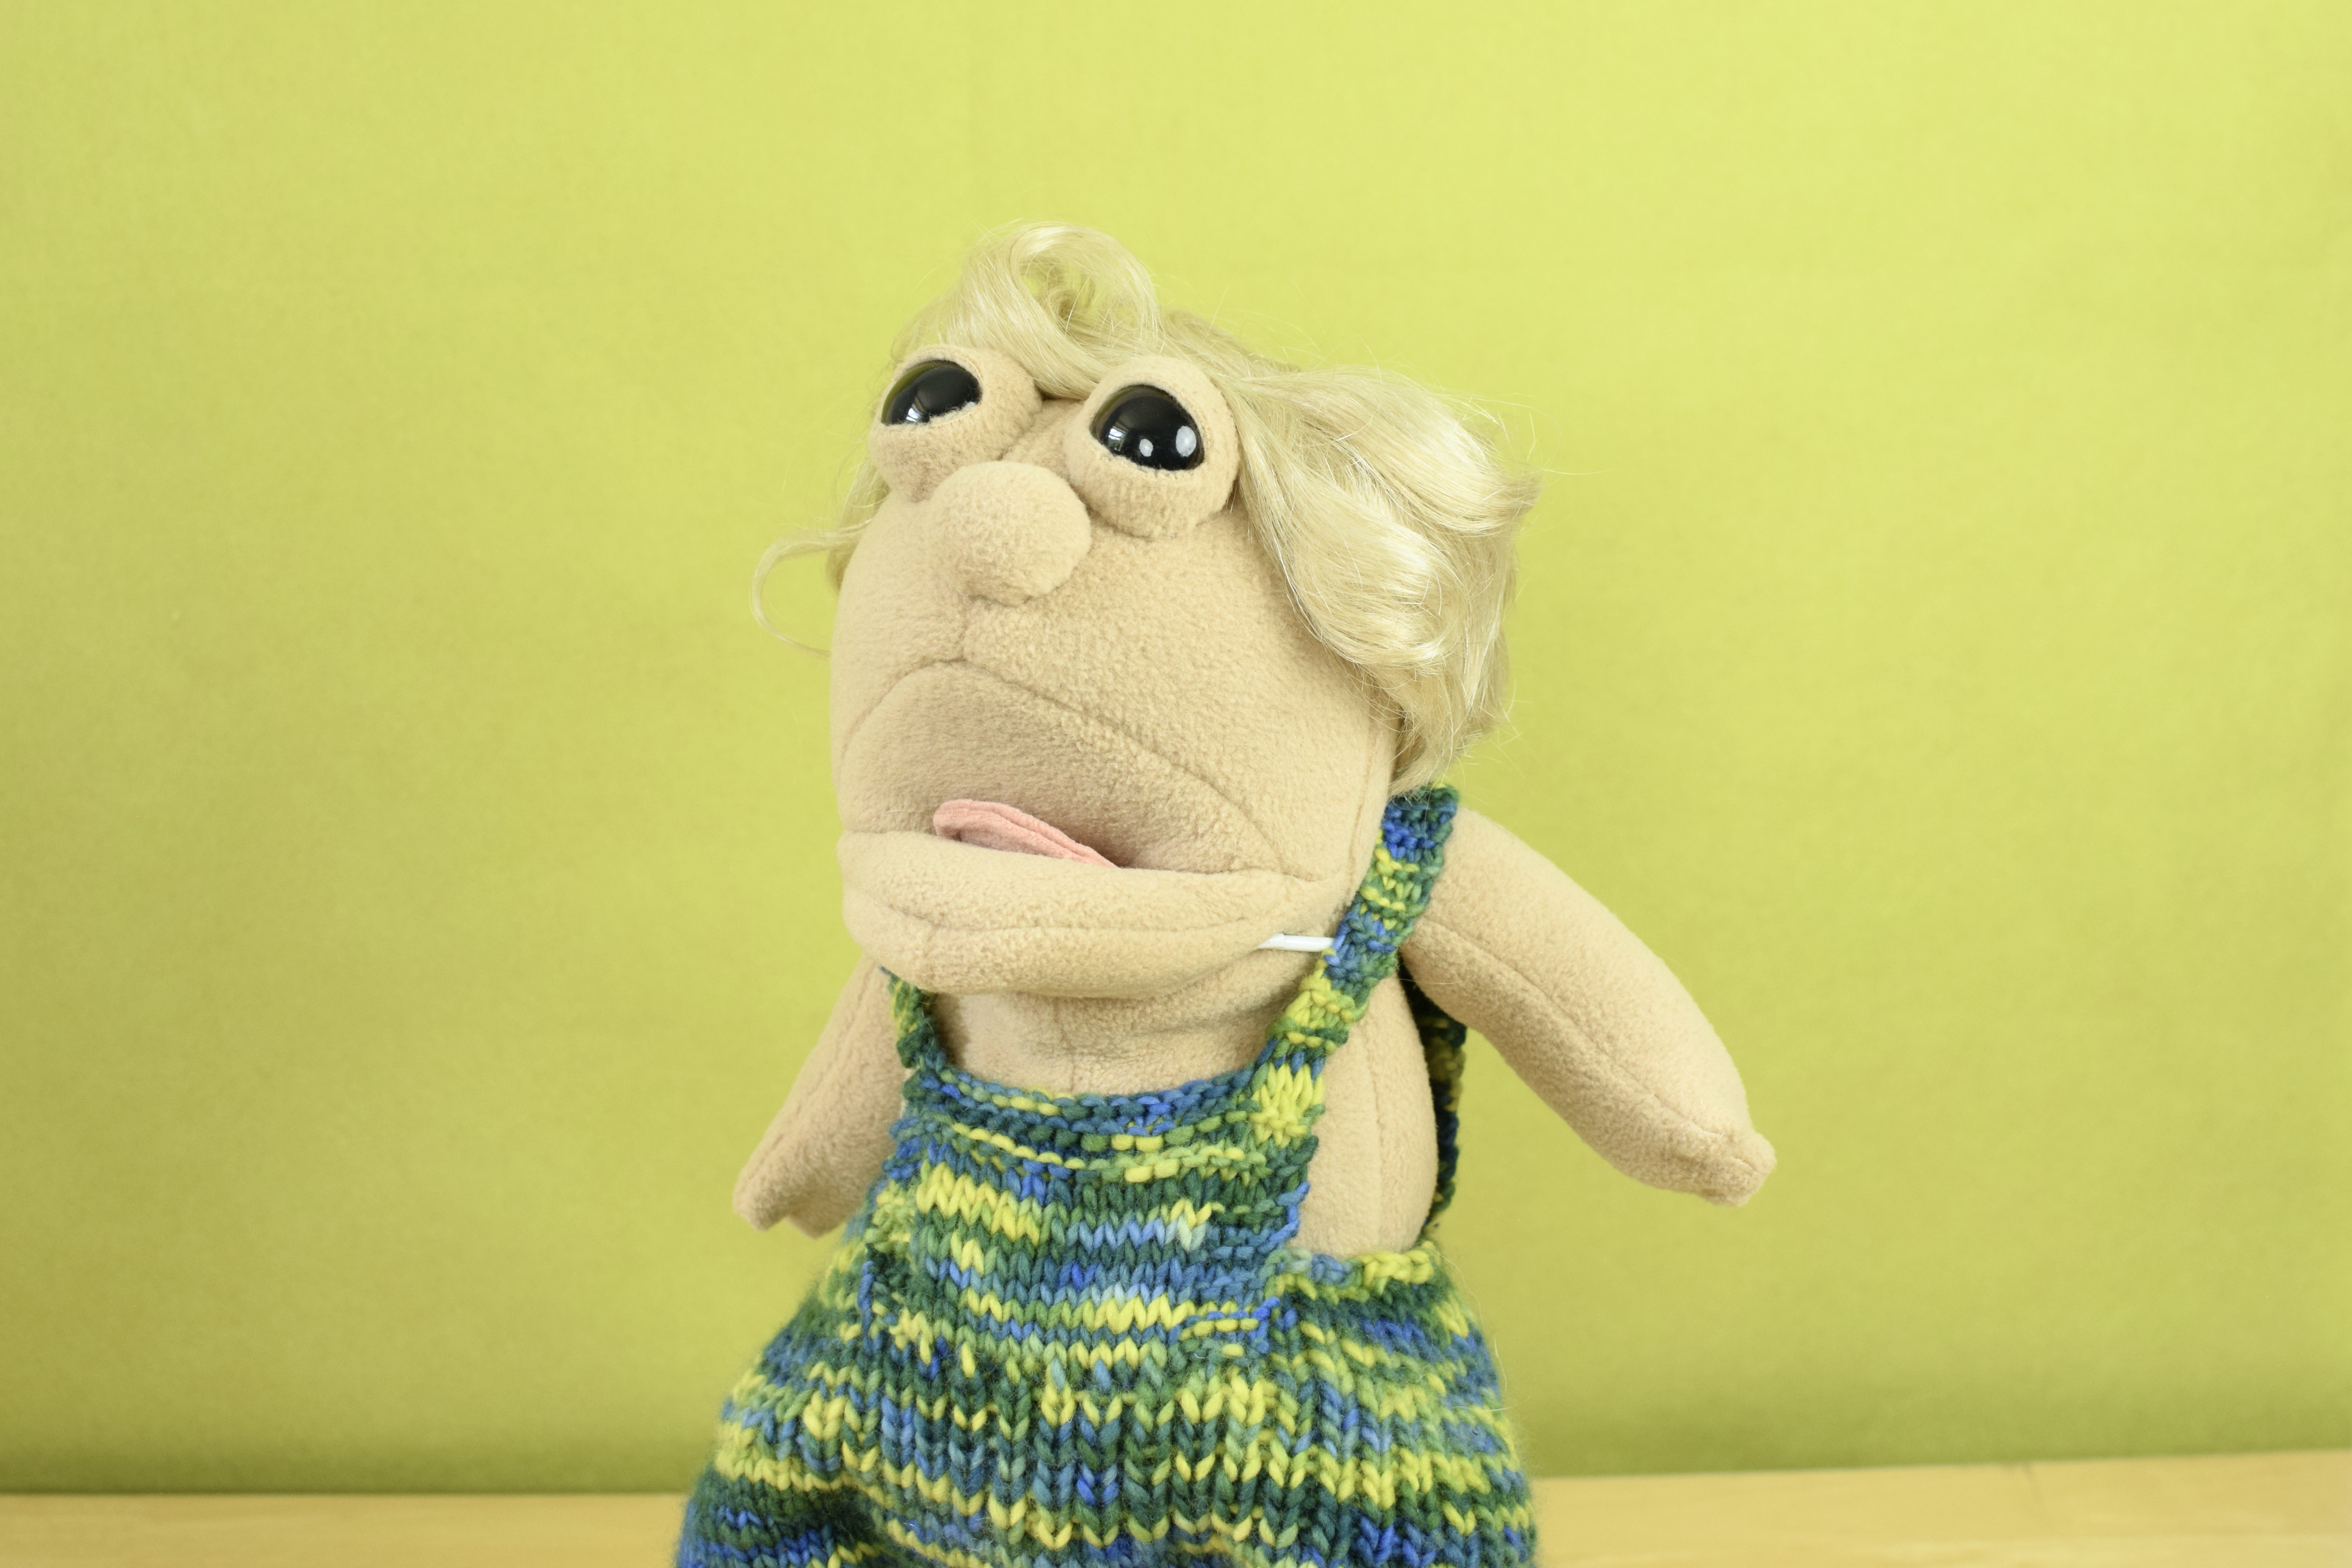
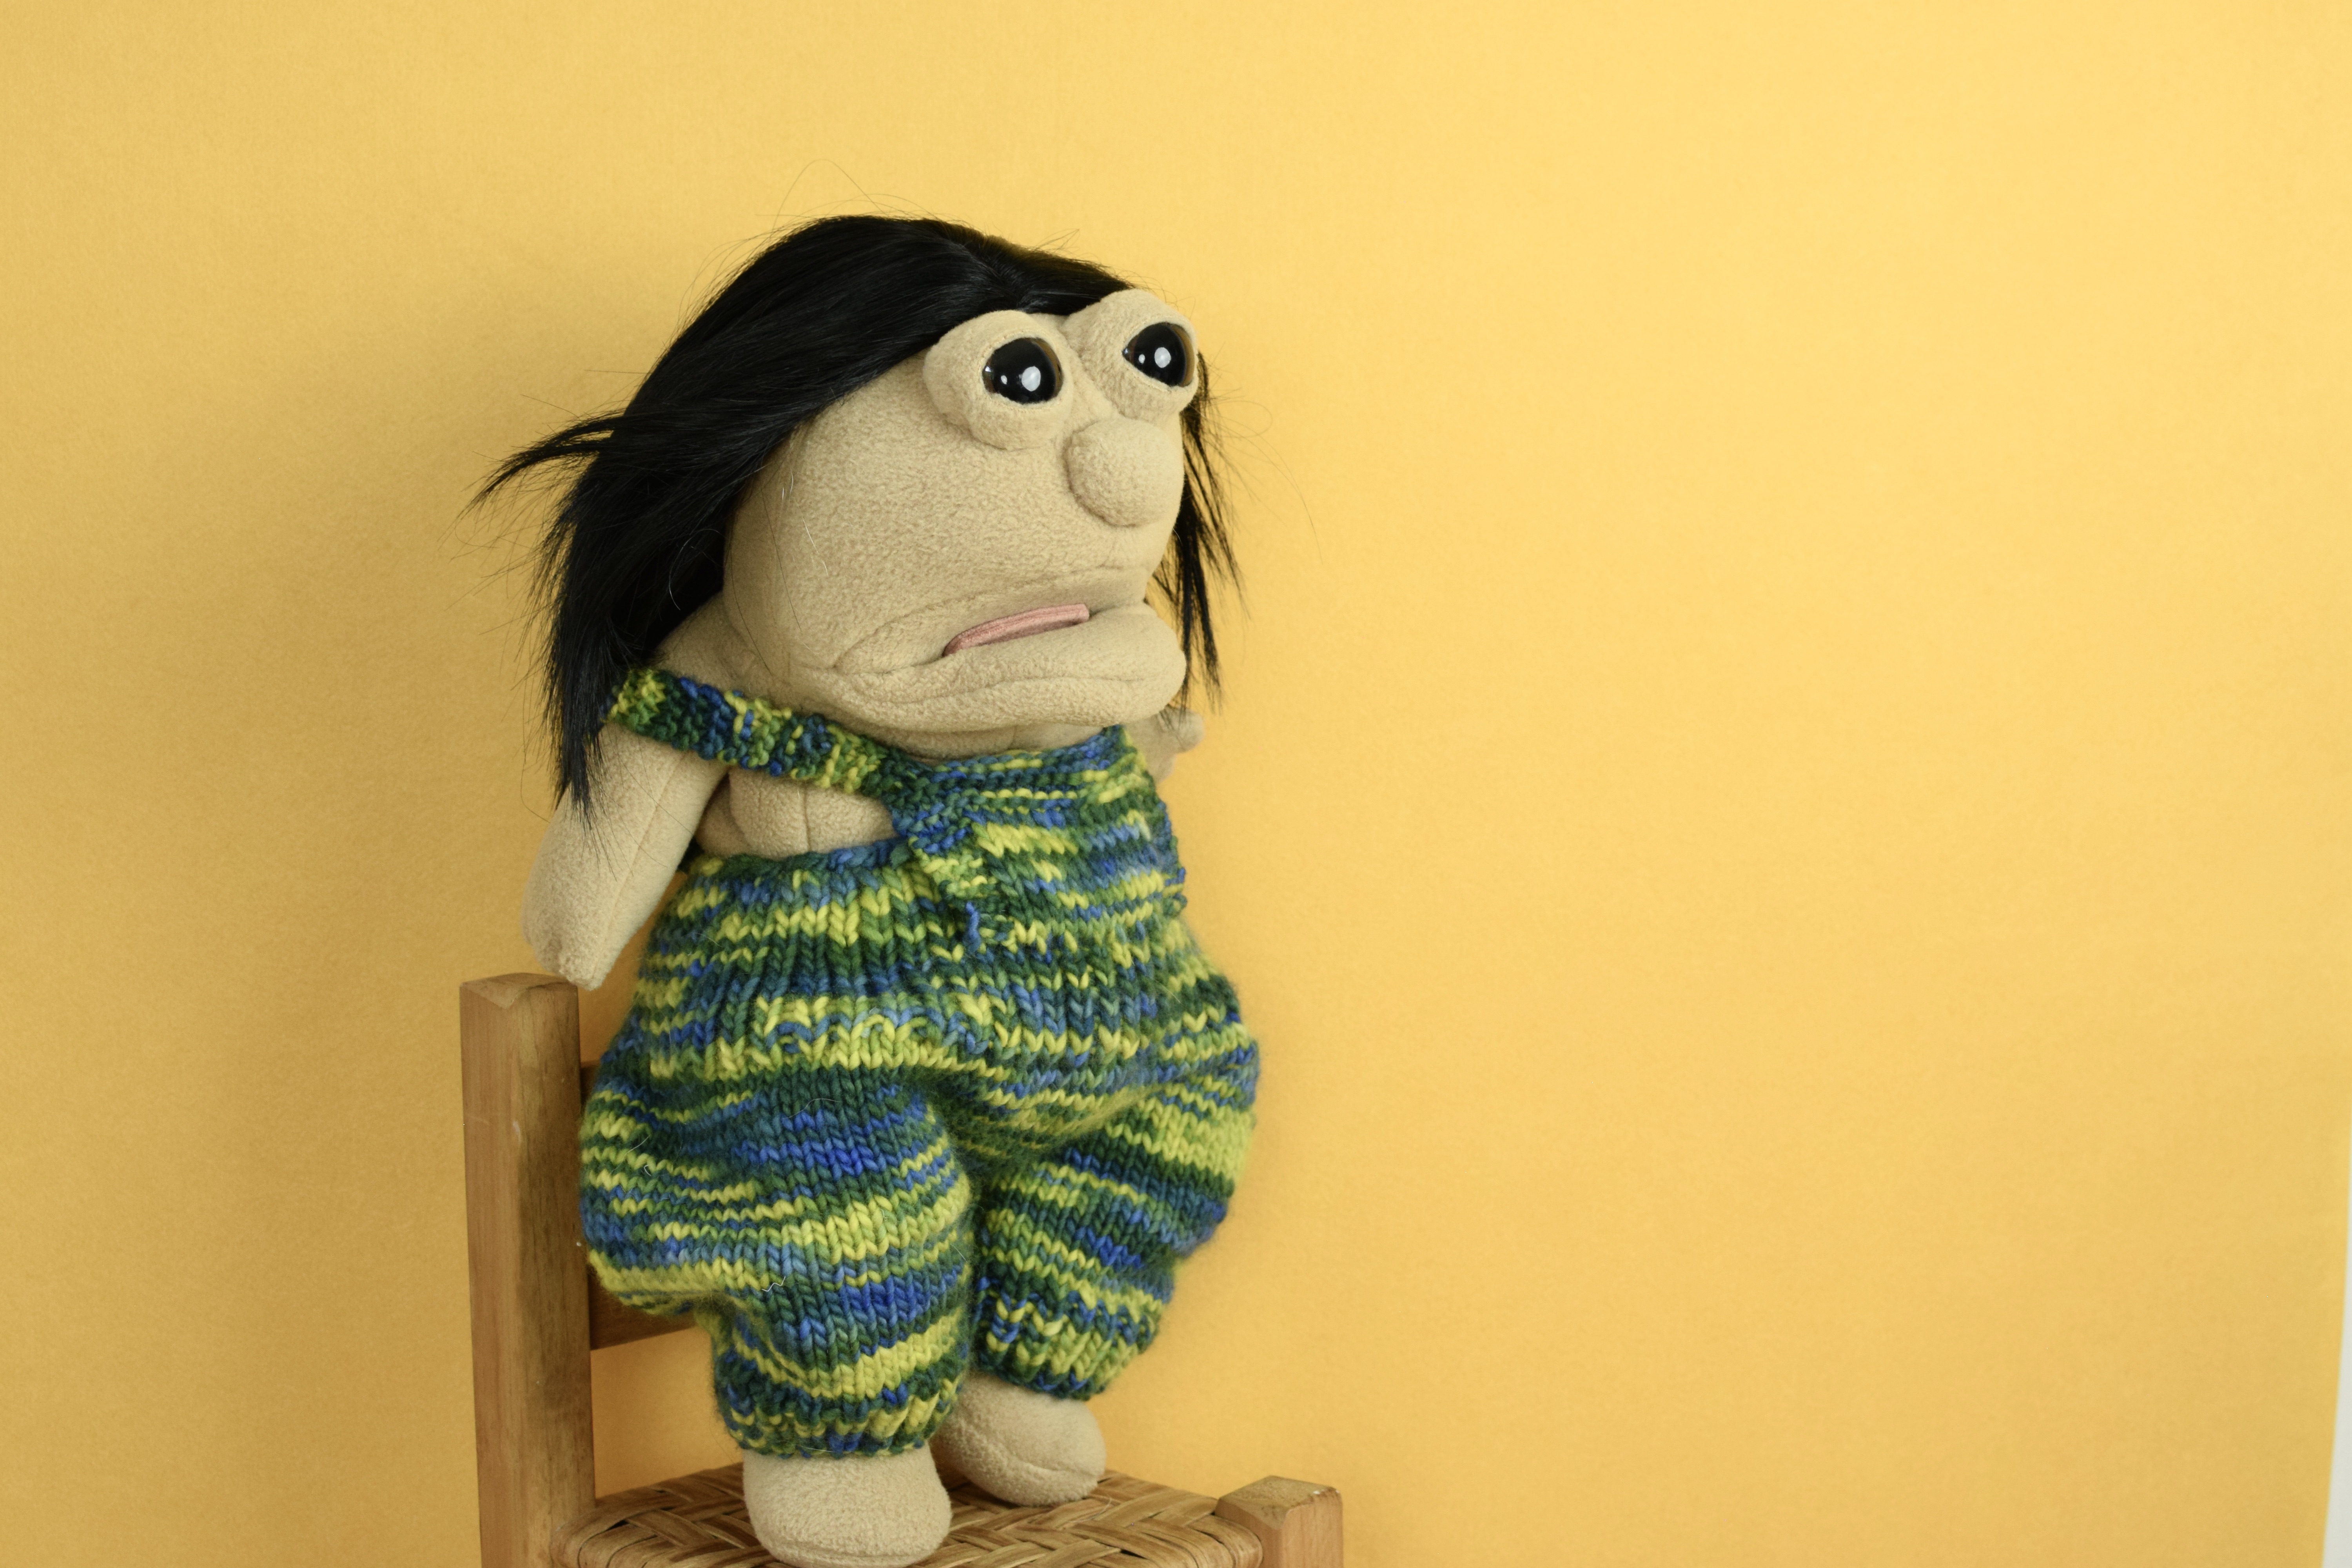
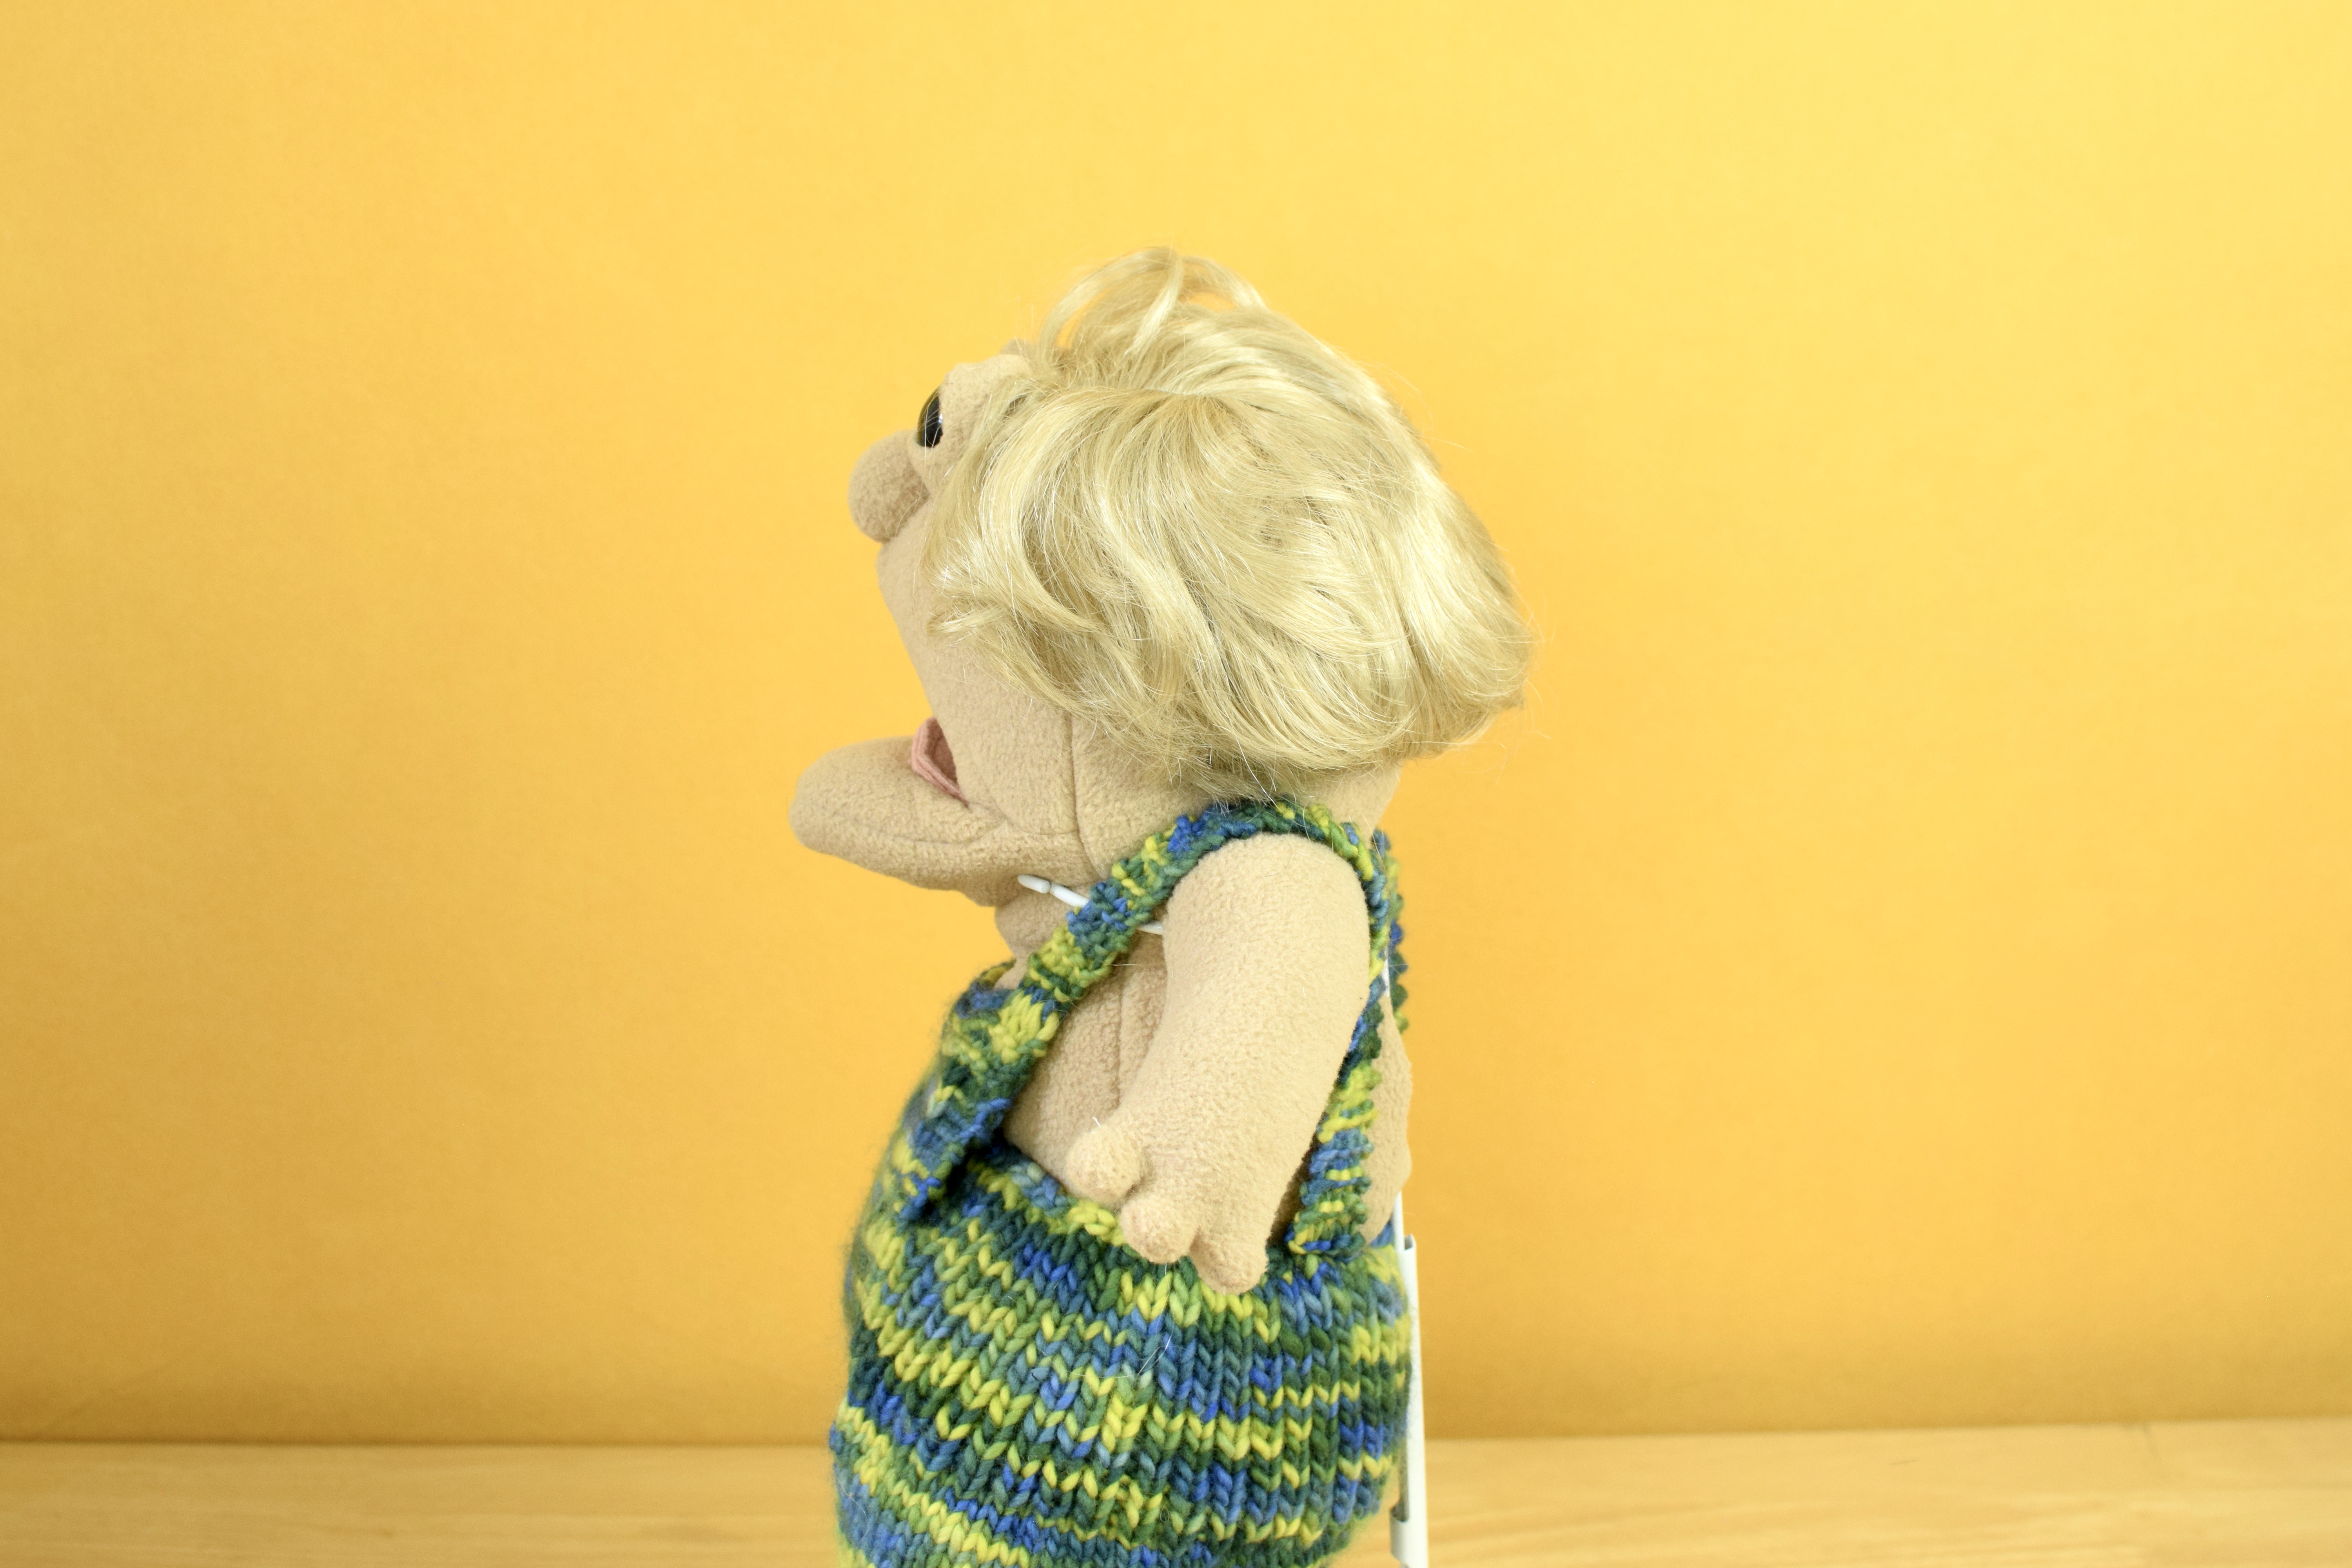
What are 2D plush (I started using this term a long time ago but recently realized some others do, as well, so I’m not sure who coined it)? Basically, this is how I refer to plush that are created by creating one, flat shape, sewing two pieces of fabric together in that shape, (usually) turning it and then stuffing it. Of course, once stuffed, it isn’t truly two-dimensional anymore, but three-dimensional! But it doesn’t rely on the pattern to create any of that dimension. And, it’s not nearly as 3d or shapely as a more complicated pattern.

I’ll admit, I didn’t really enjoy 2D plush when handmade plush first started getting more popular. I didn’t like how flat they looked and I also have a habit of wanting things to be as complicated as possible for no good reason–while these seemed simple. I still don’t often make fully 2D plush, but I often use a combination of 2D and 3D flat pattern drafting with my dolls and soft toys. And I have really come around to some of their merits.

If you stick around long enough to learn 3D flat pattern drafting from me, you’ll see it can be a lot of work. There are some situations where 2D is truly the better choice, so why make it harder than it needs to be!

Here are some advantages of 2D:

  1. 2D plush is really good to use with fabrics that are fluffy and really difficult to work with. Cutting these fabrics (think Luxe Cuddle) is often agonizing, what with the shedding and slipping around. So a very simple pattern reduces cutting time. In fact, one of the biggest advantages of a 2D pattern is that you can simply trace the shape (without seam allowance) onto the backside of the folded fabric, pin it, and sew on the line. You do still have to cut it out, but in this case you don’t need to worry as much about the fabric pieces staying together properly and slipping around.
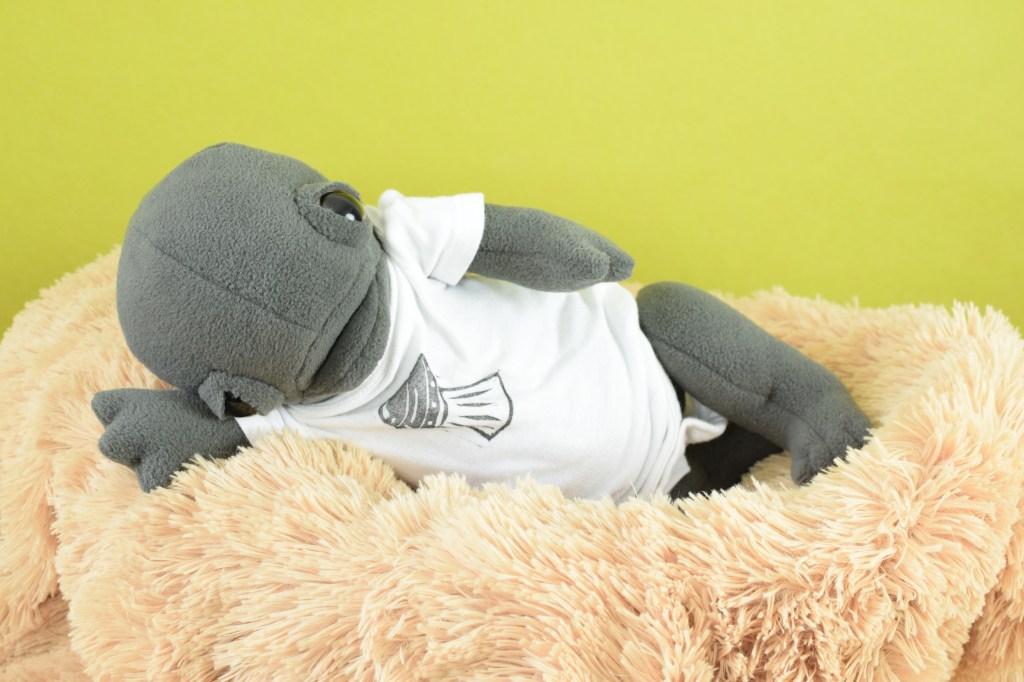
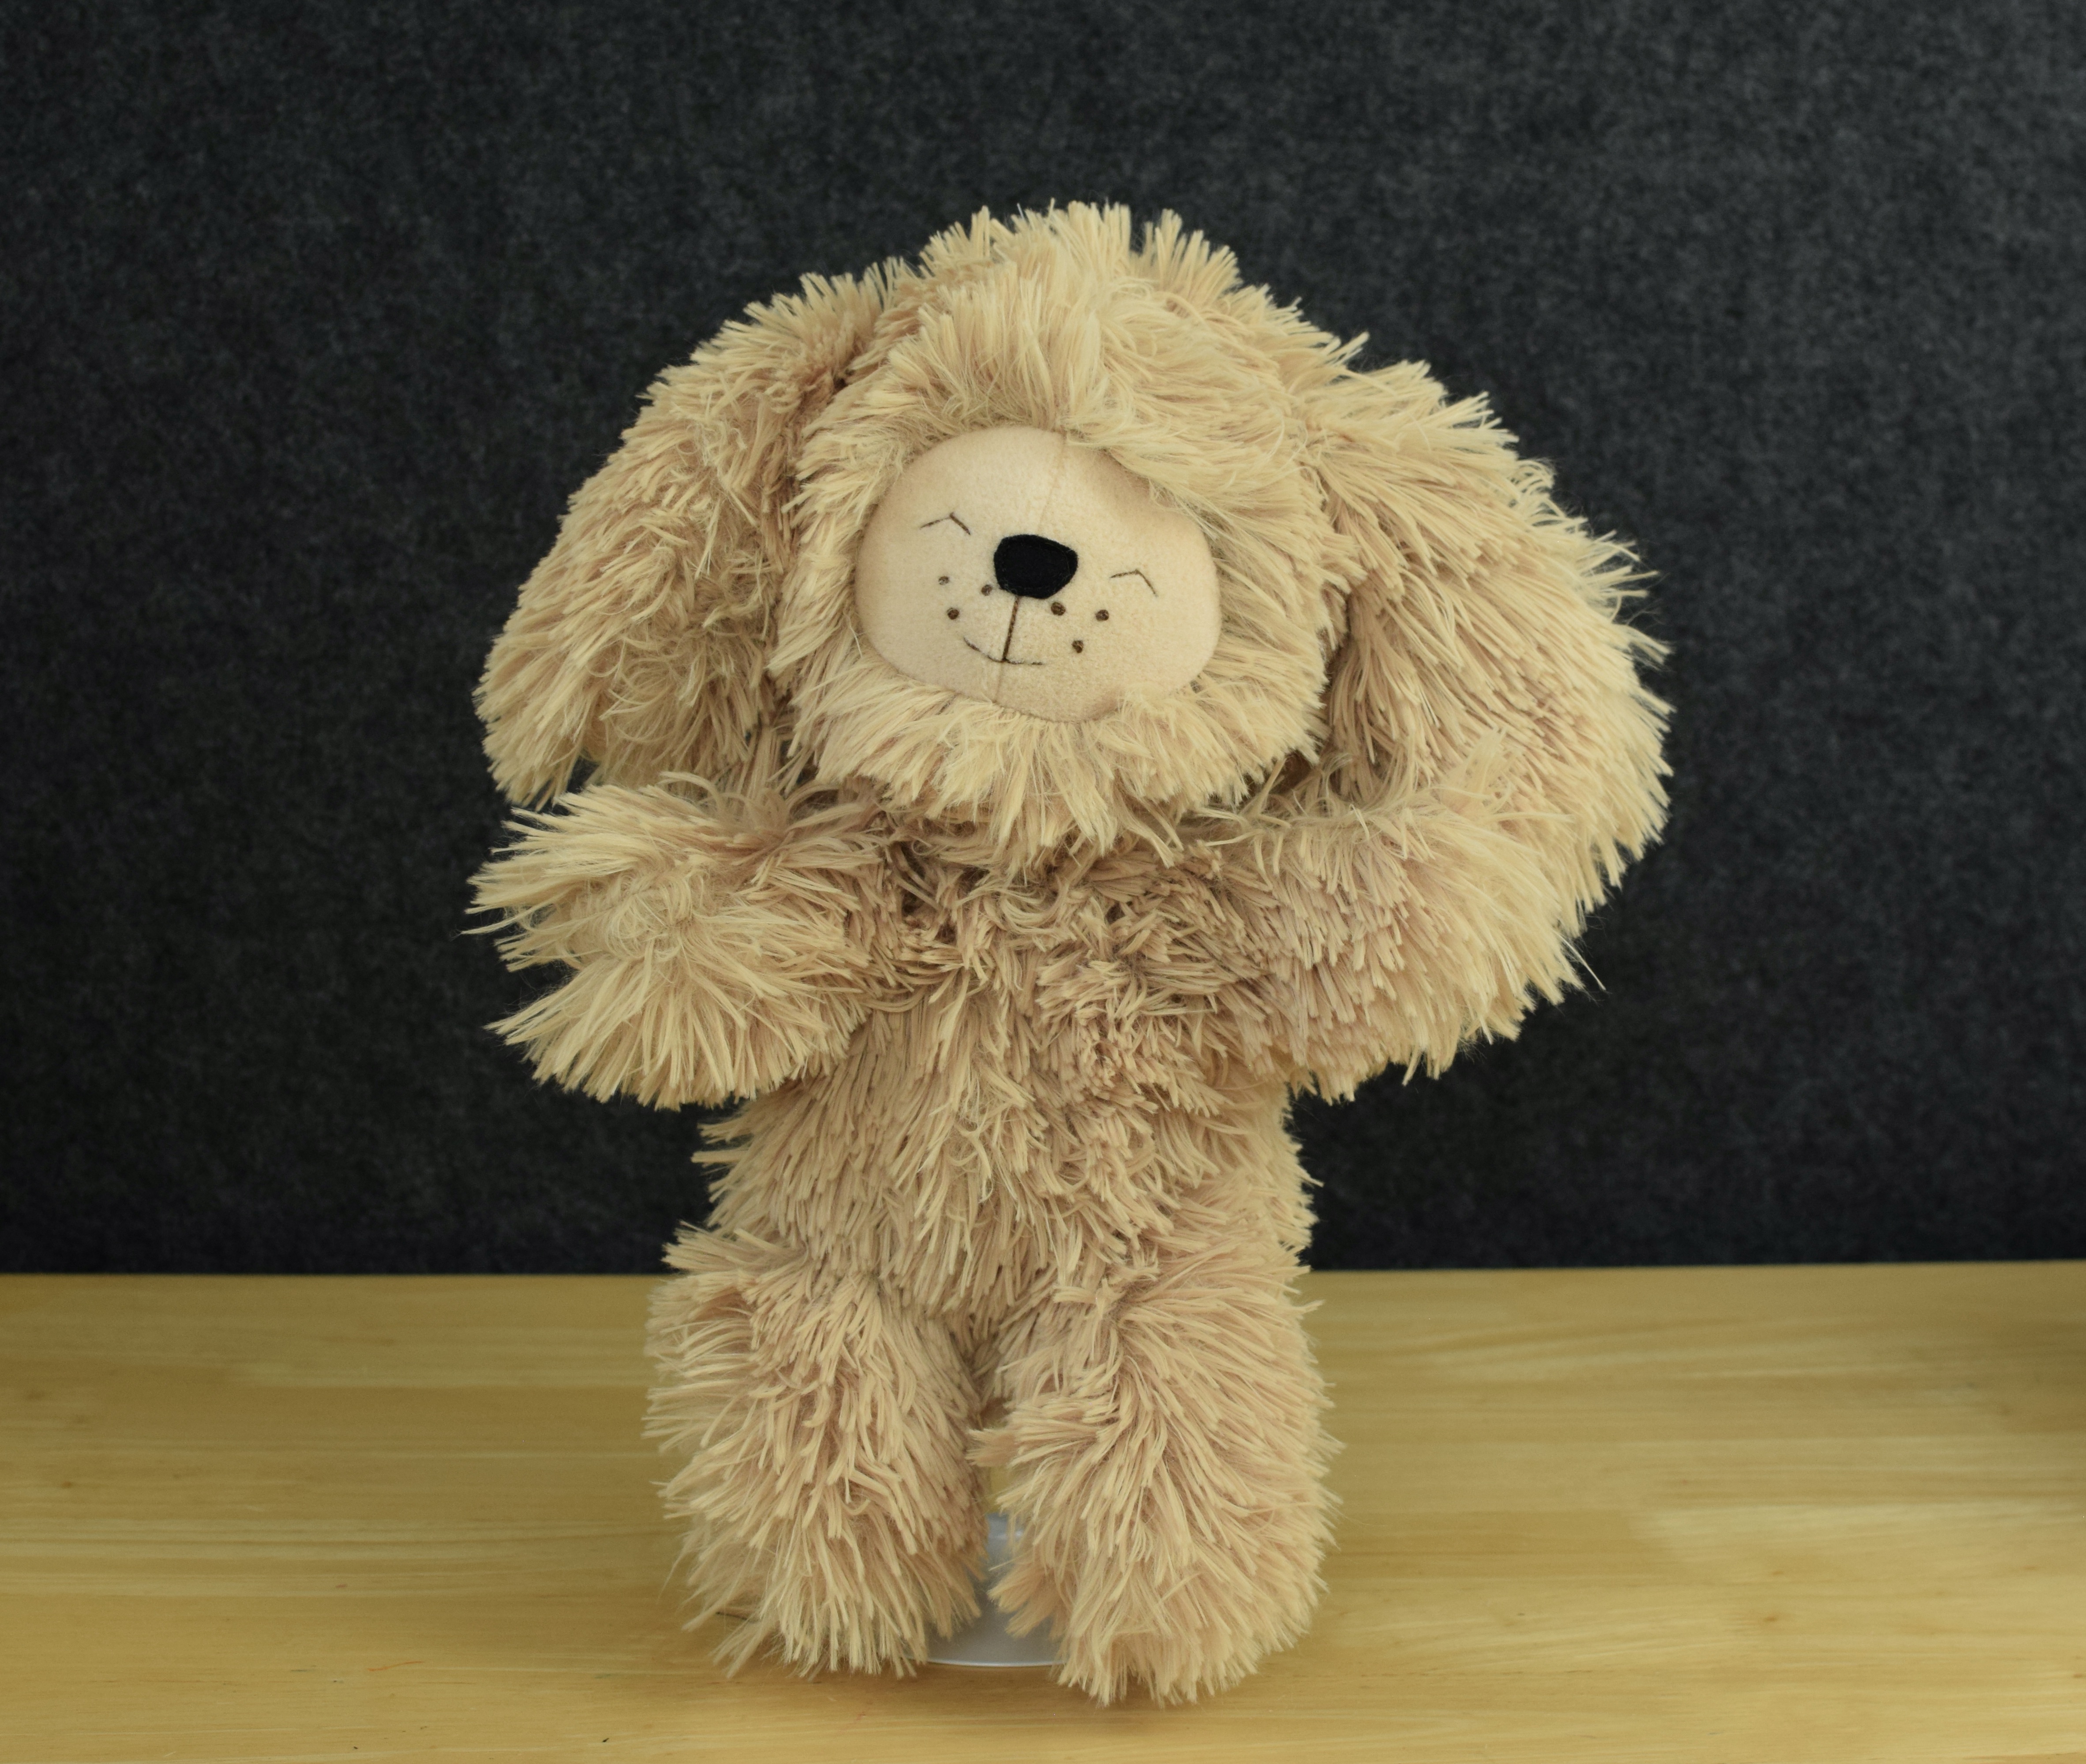
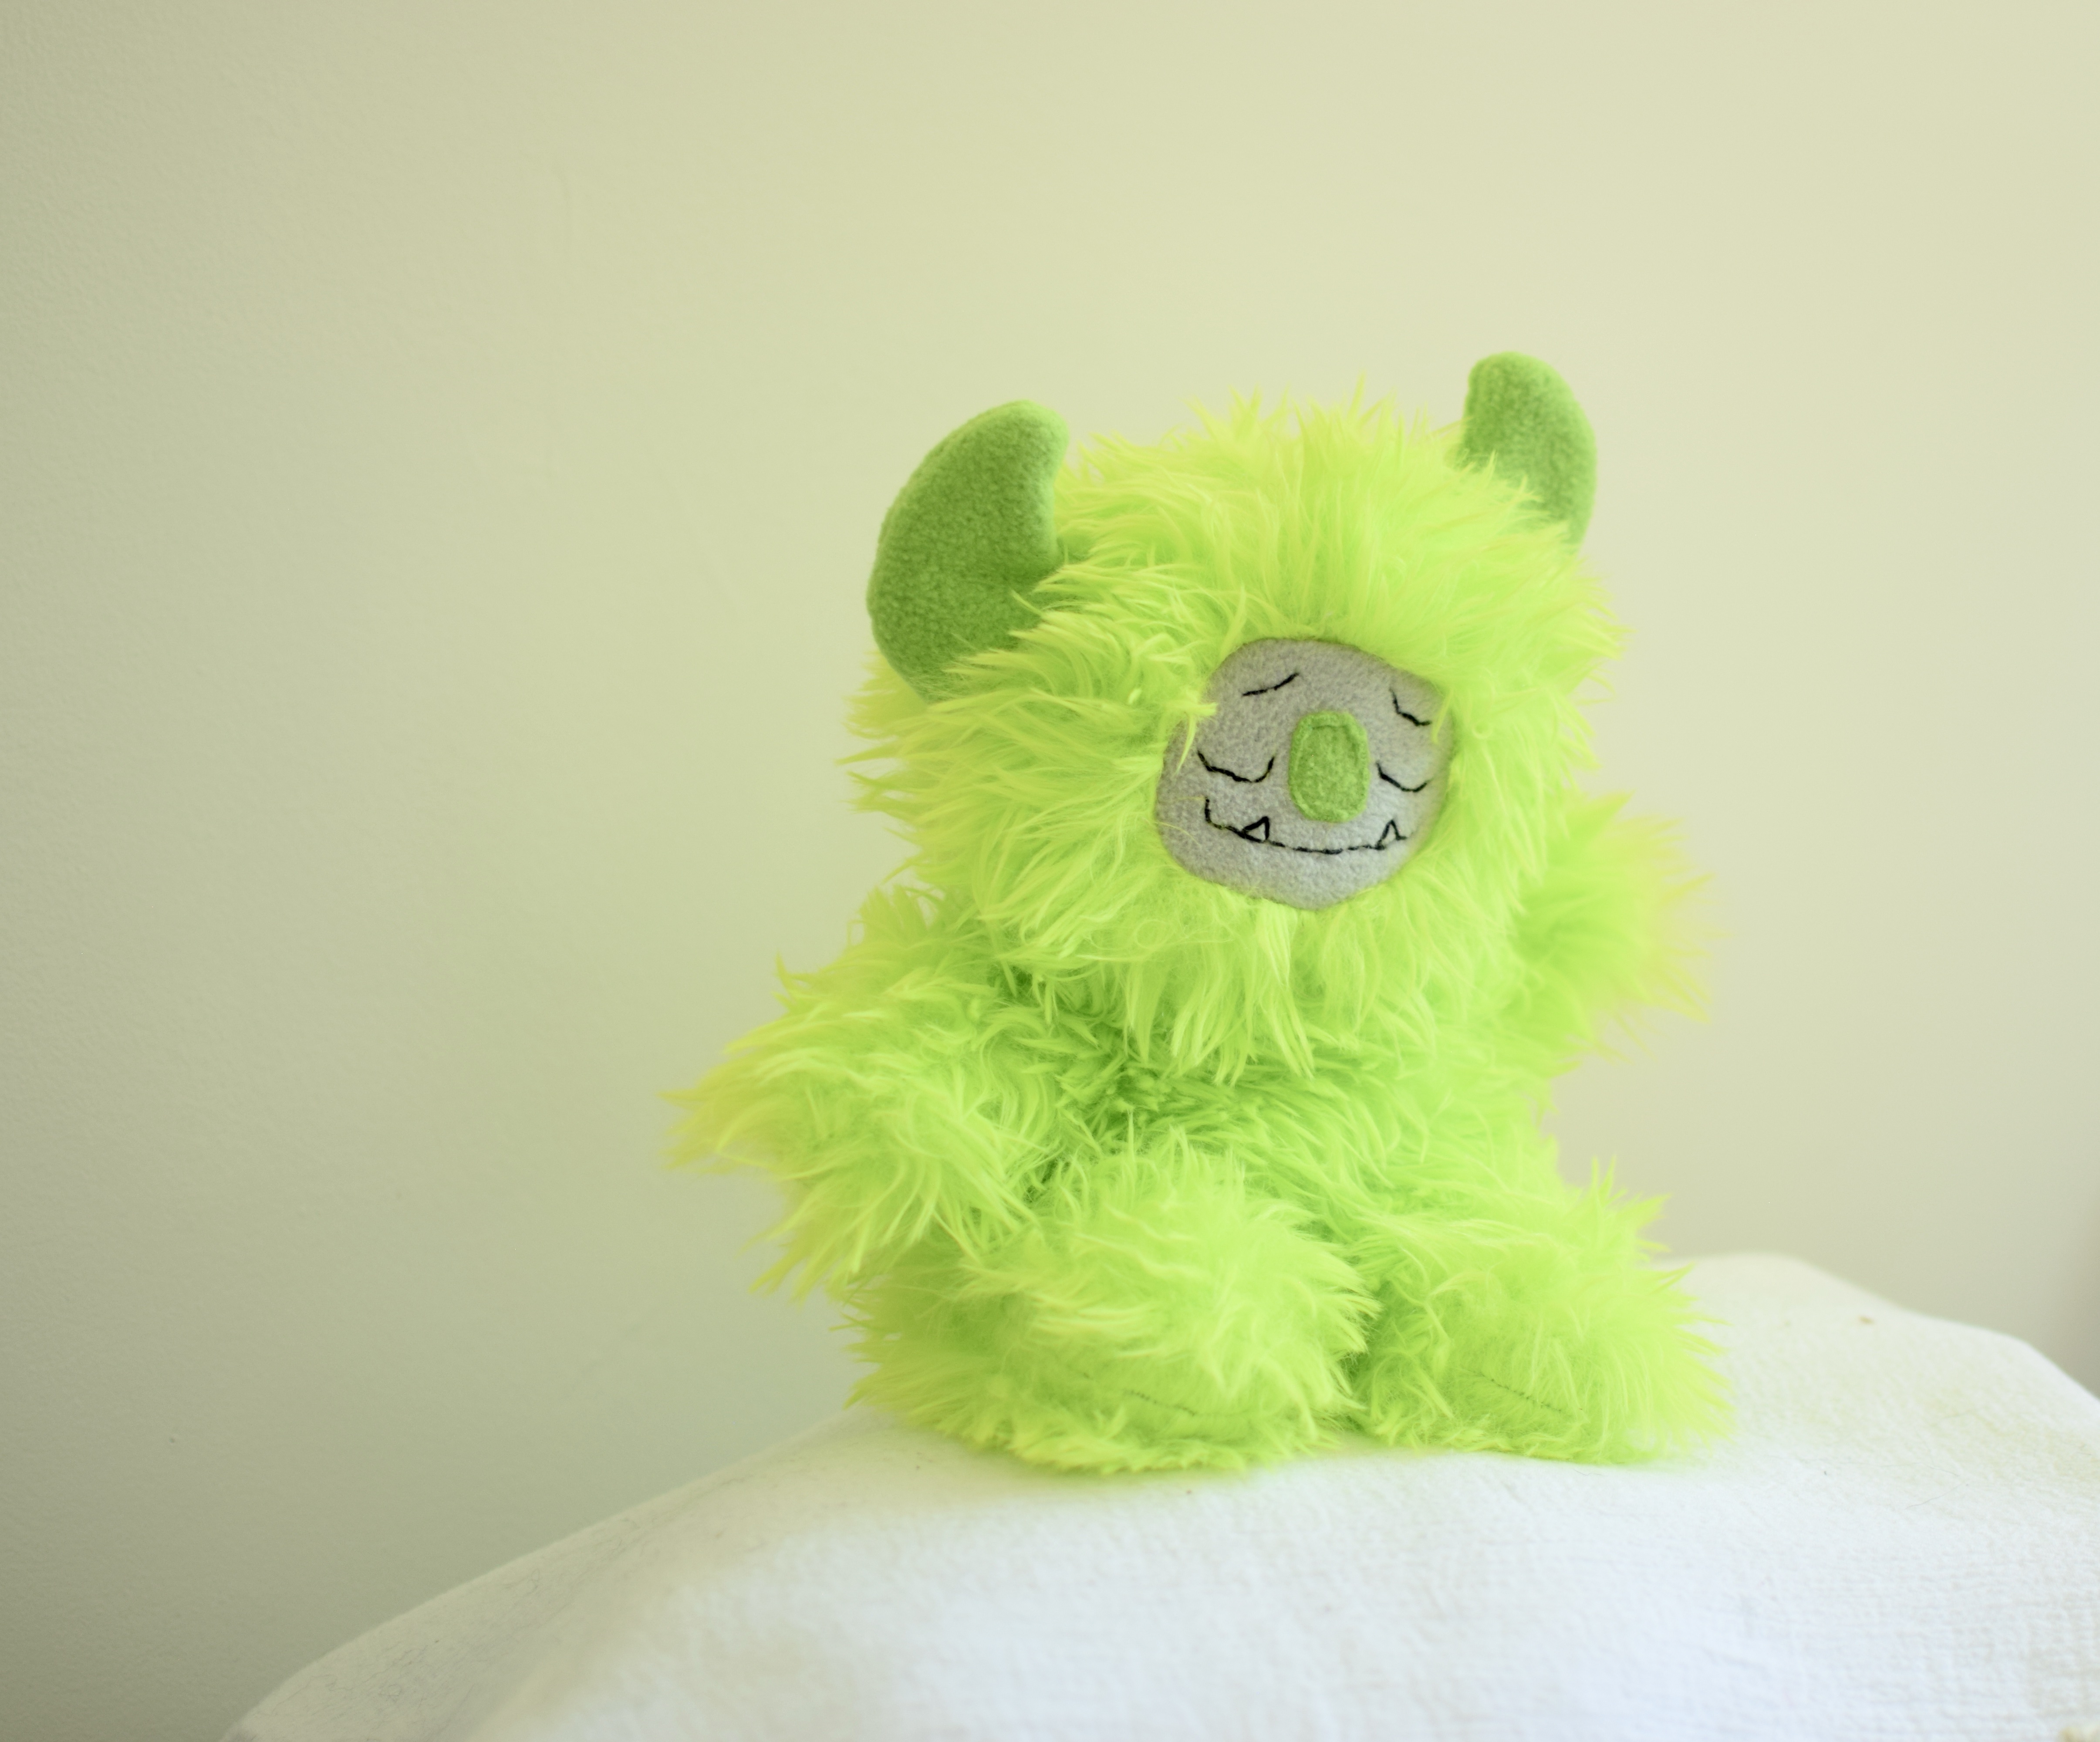
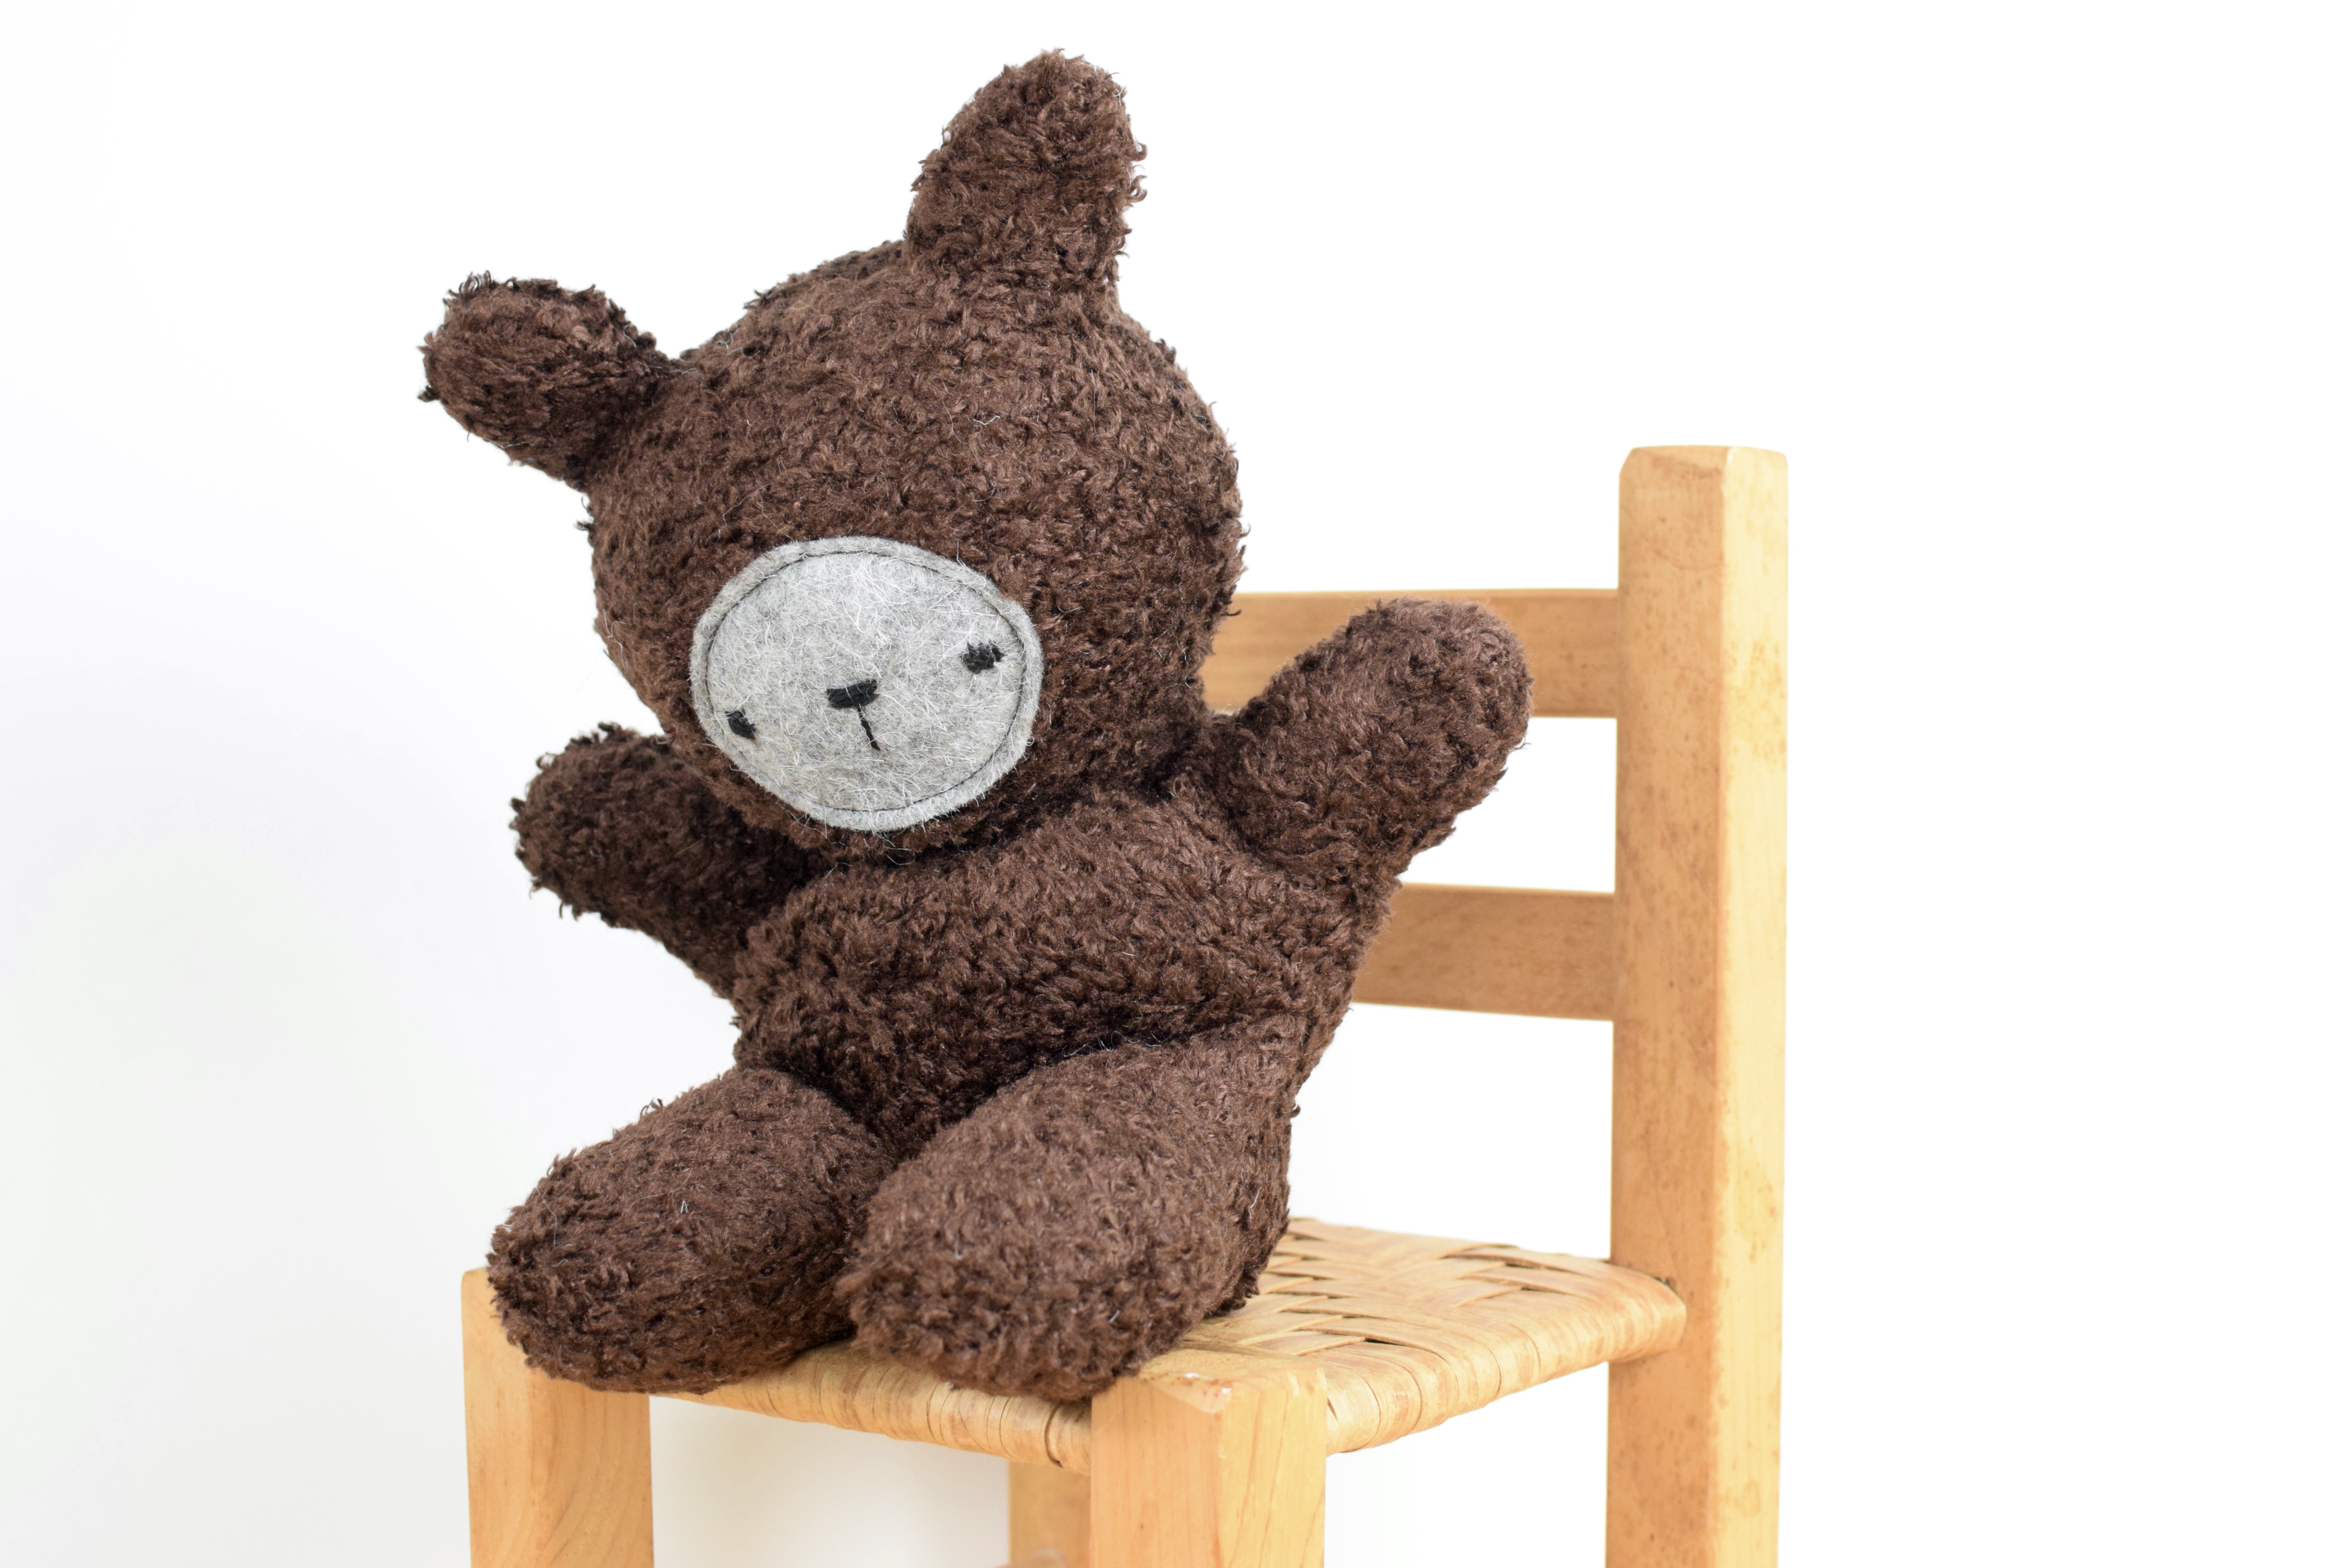
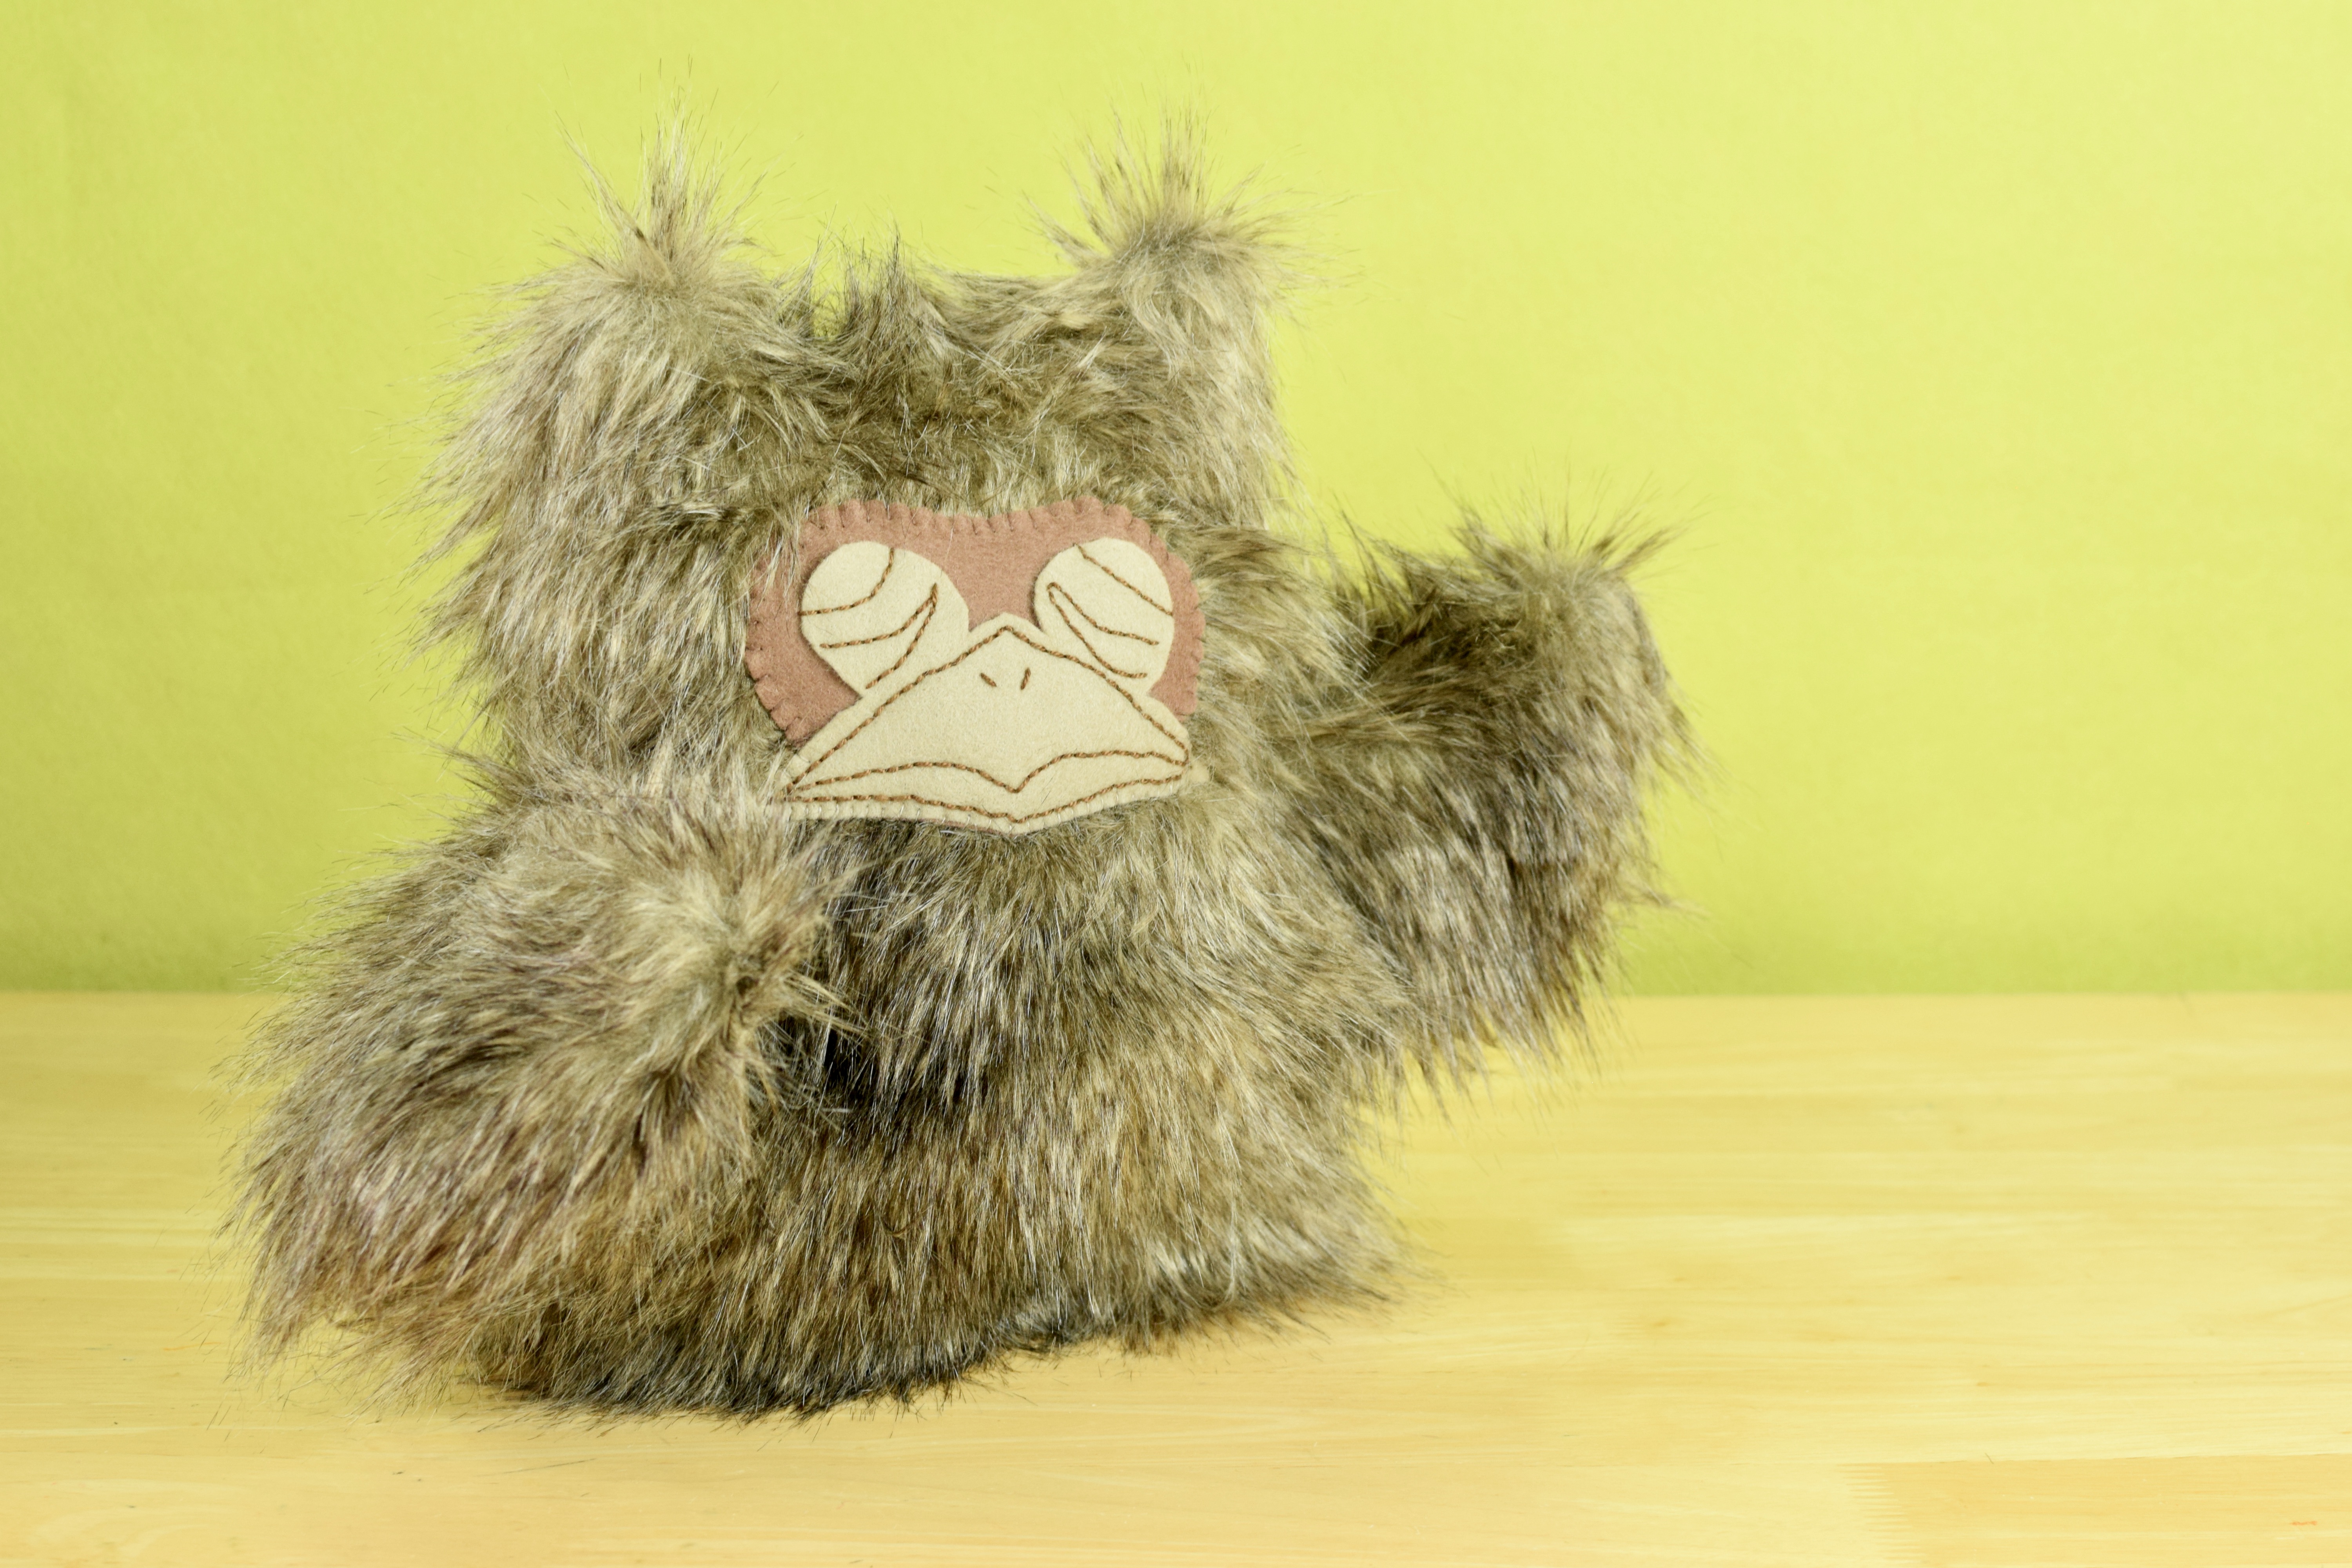
  2. On a similar note, a 2D pattern often allows these fun and fluffy, yet FUSSY, fabrics to shine. Seamlines from a more complicated pattern will often be obscured by the longer fibers anyway, so why create extra work for yourself? The owl above is a 2D pattern with lots of dimension thanks to the fabric.
  3. 2D plush are great for stretchy fabrics. Many Waldorf dollmakers use a full body 2D doll pattern that has no darts at all. The fabric is so stretchy and stuffed so firmly that the doll will look round and full, and they use other techniques to add details like elbows and such. Making a more detailed pattern is actually counter productive if you’re using fabric with true stretch.
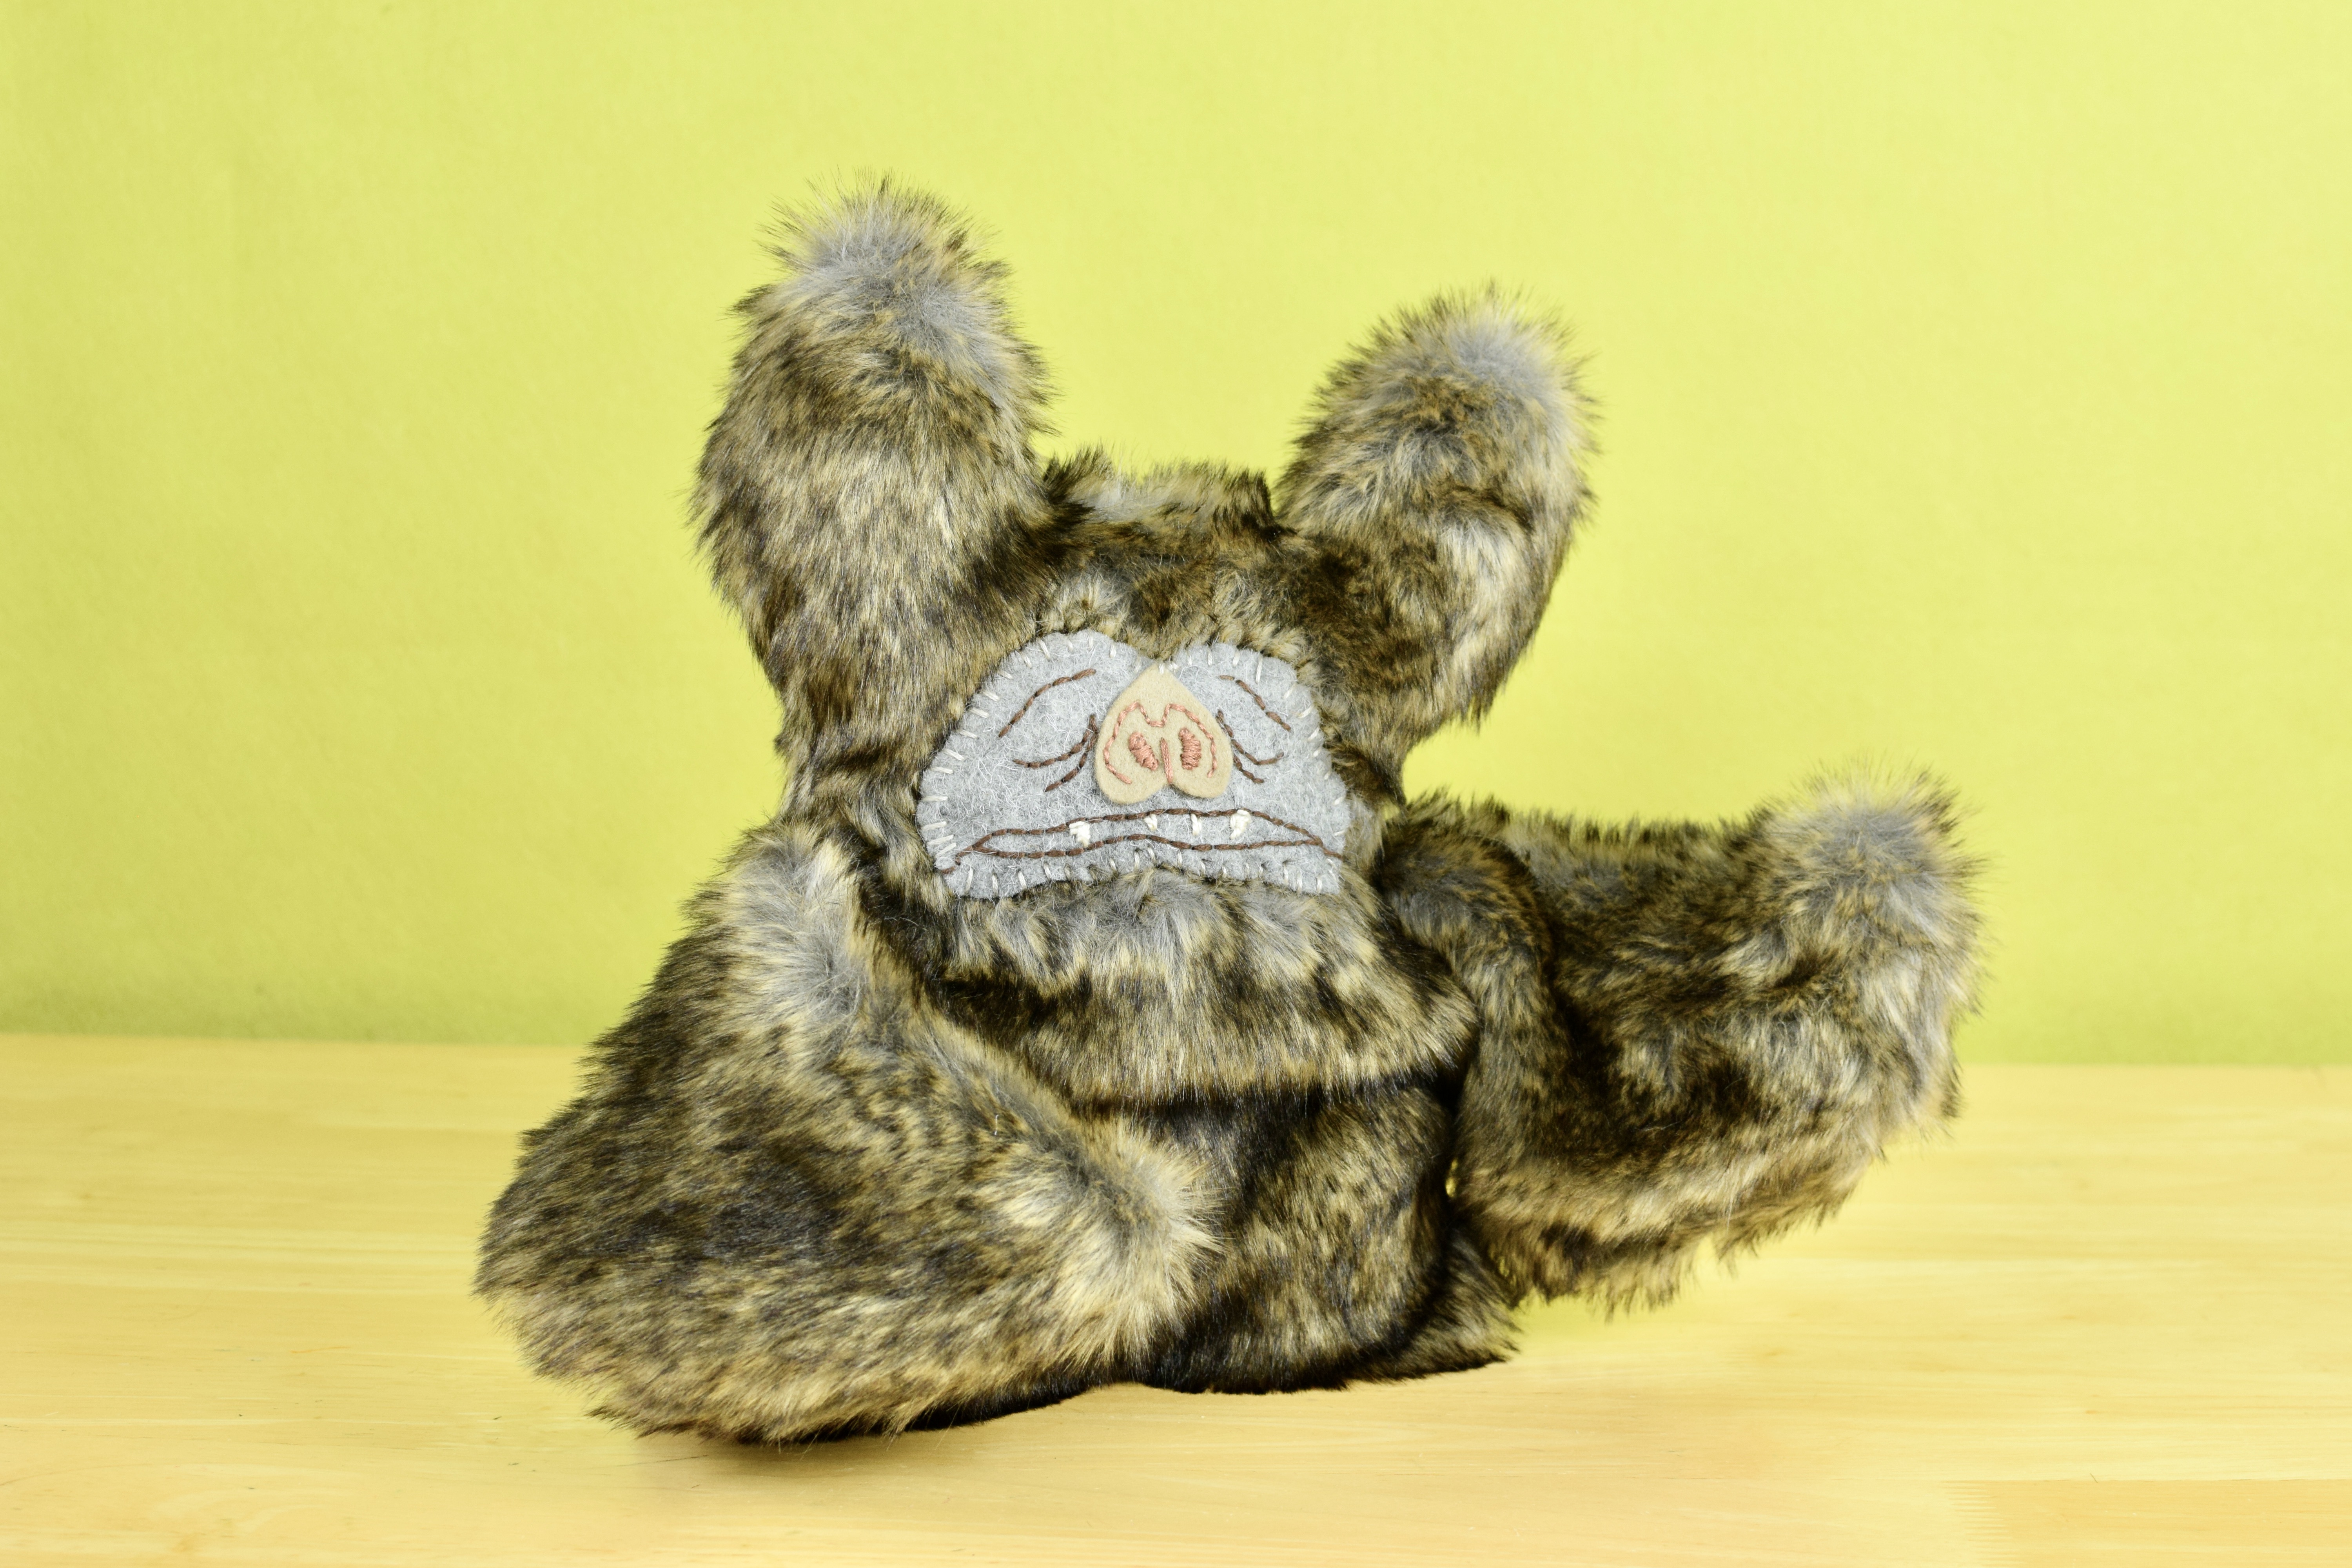
  4. 2D plush are great if you want to weight the plush heavily. This is a similar situation as above in that the extra amount of weight is going to sink down which means that any dimension you create with your seams will not be upheld the way it would with stuffing. The bat and owl shown above are heavily weighted.
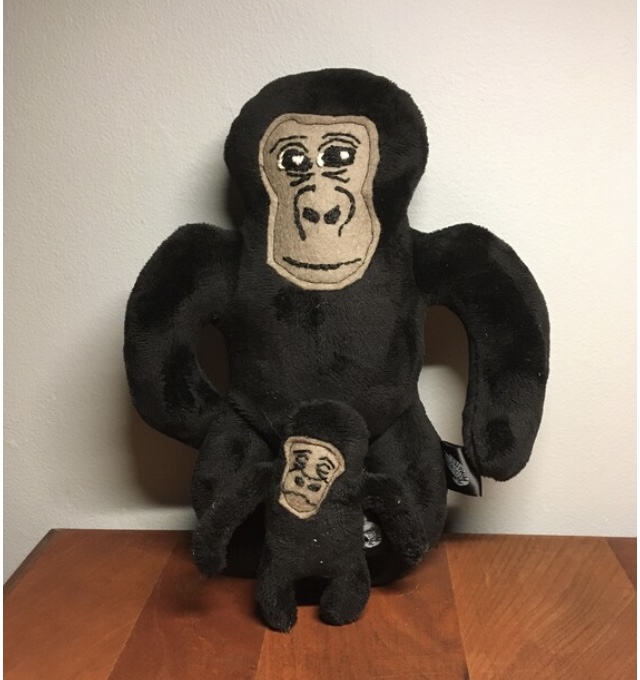
  5. 2D plush is a great choice when you’re making something tiny. The itsy-bitsy ape babies shown below are less than 5″ long. At that scale, you don’t want to be fussing with darts and seams.
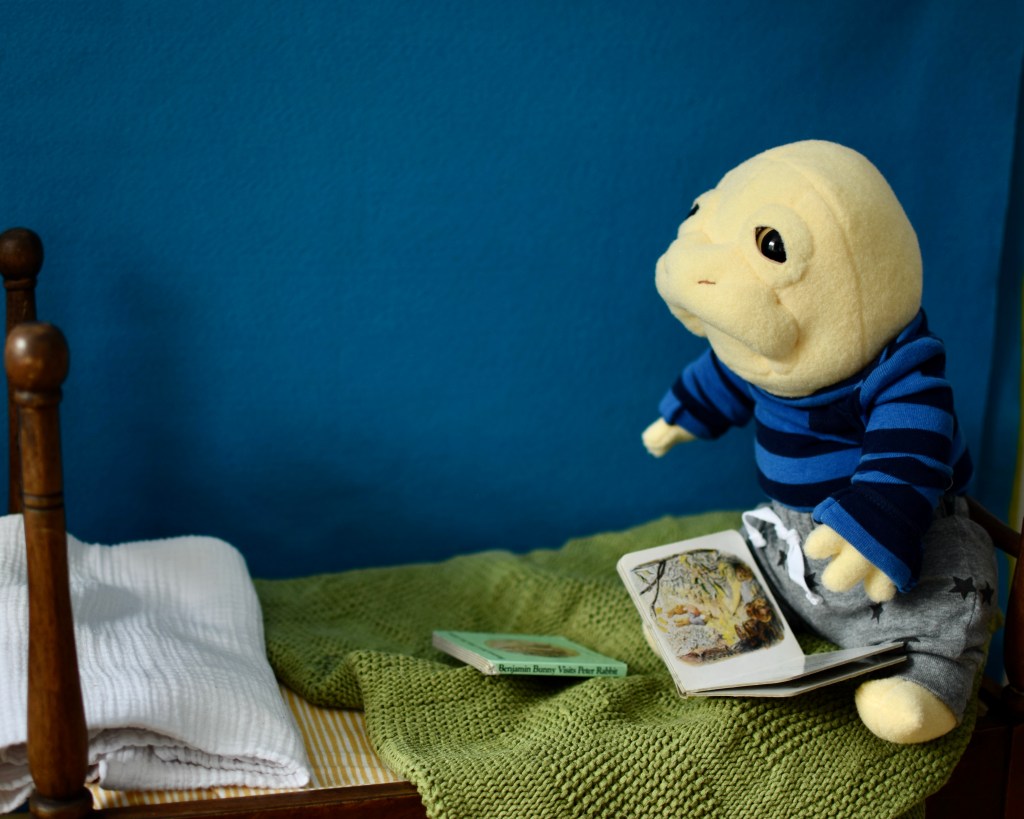
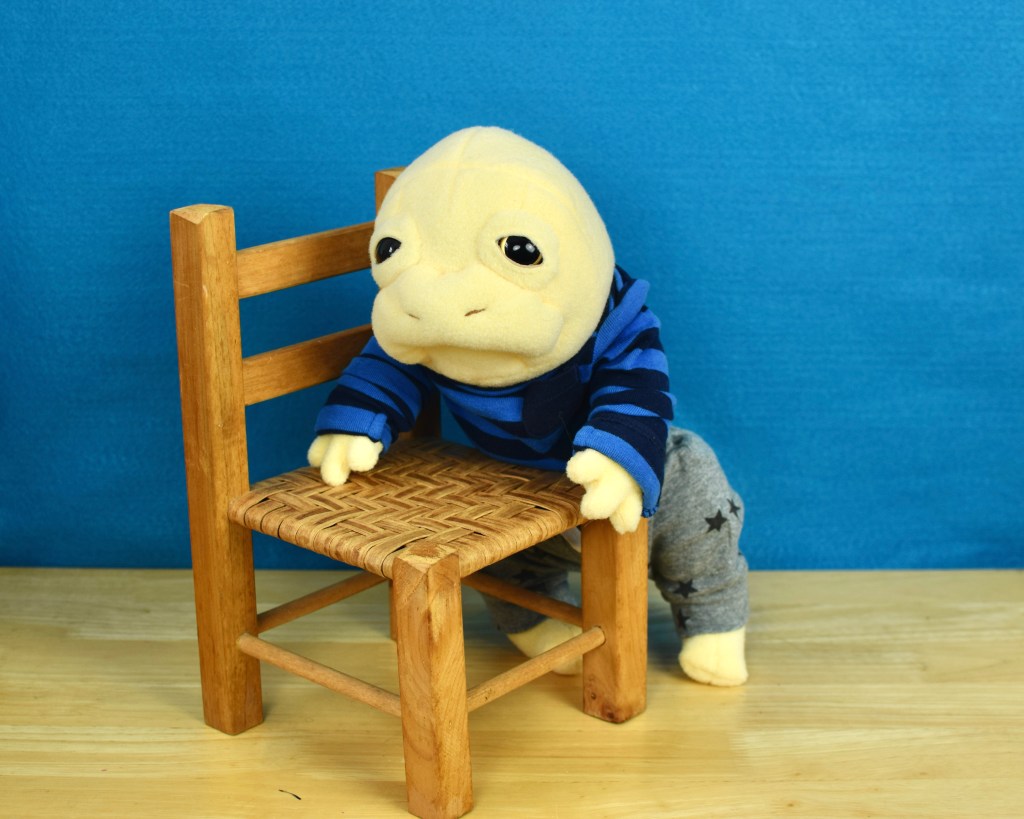
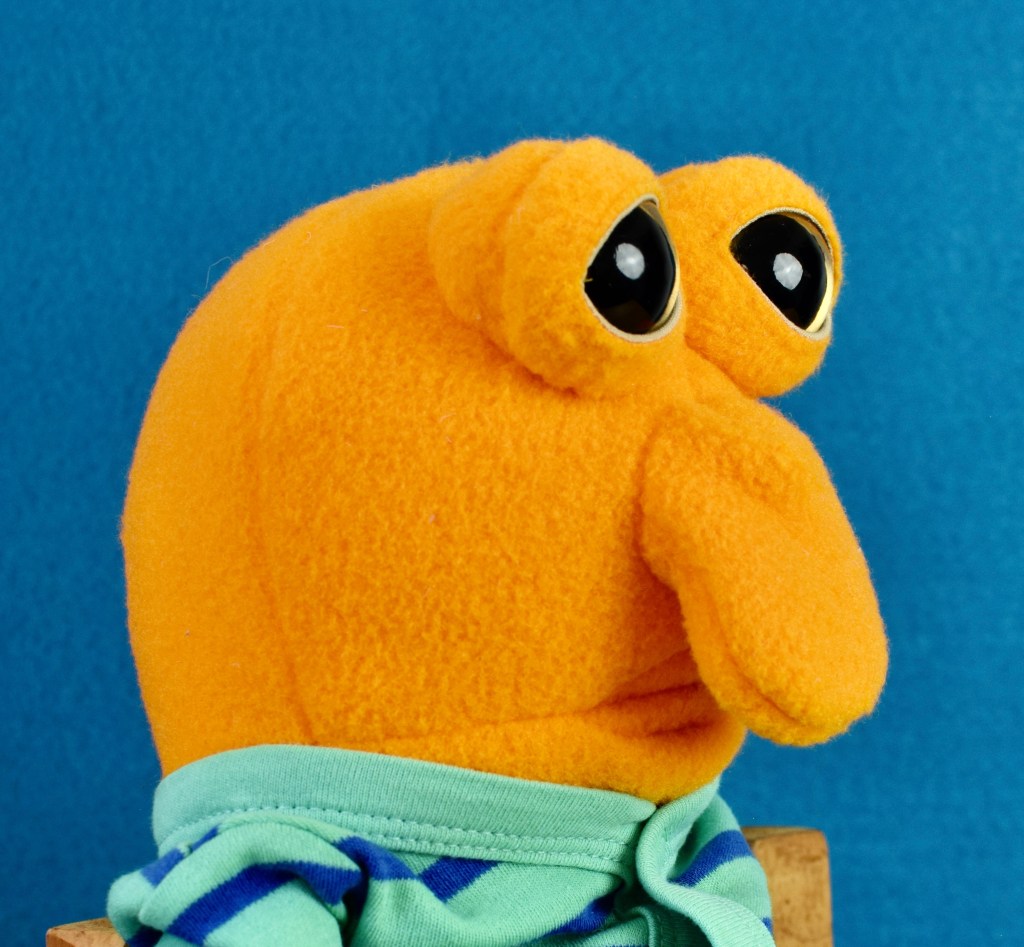
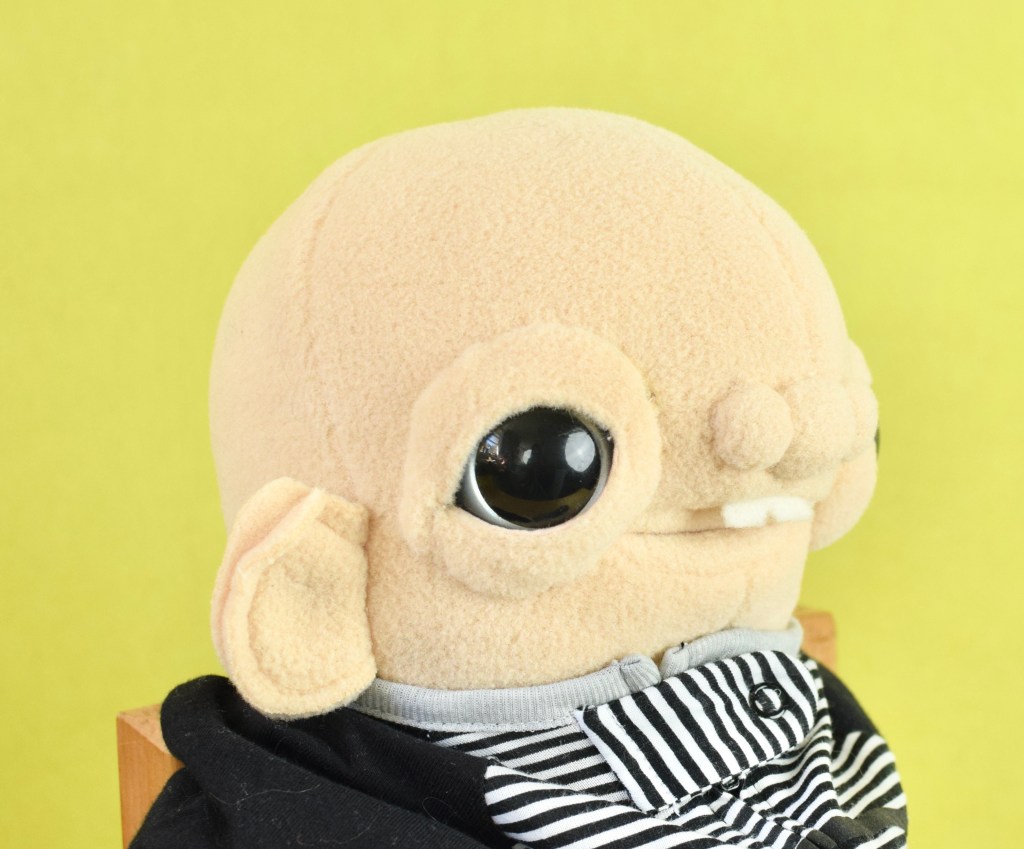
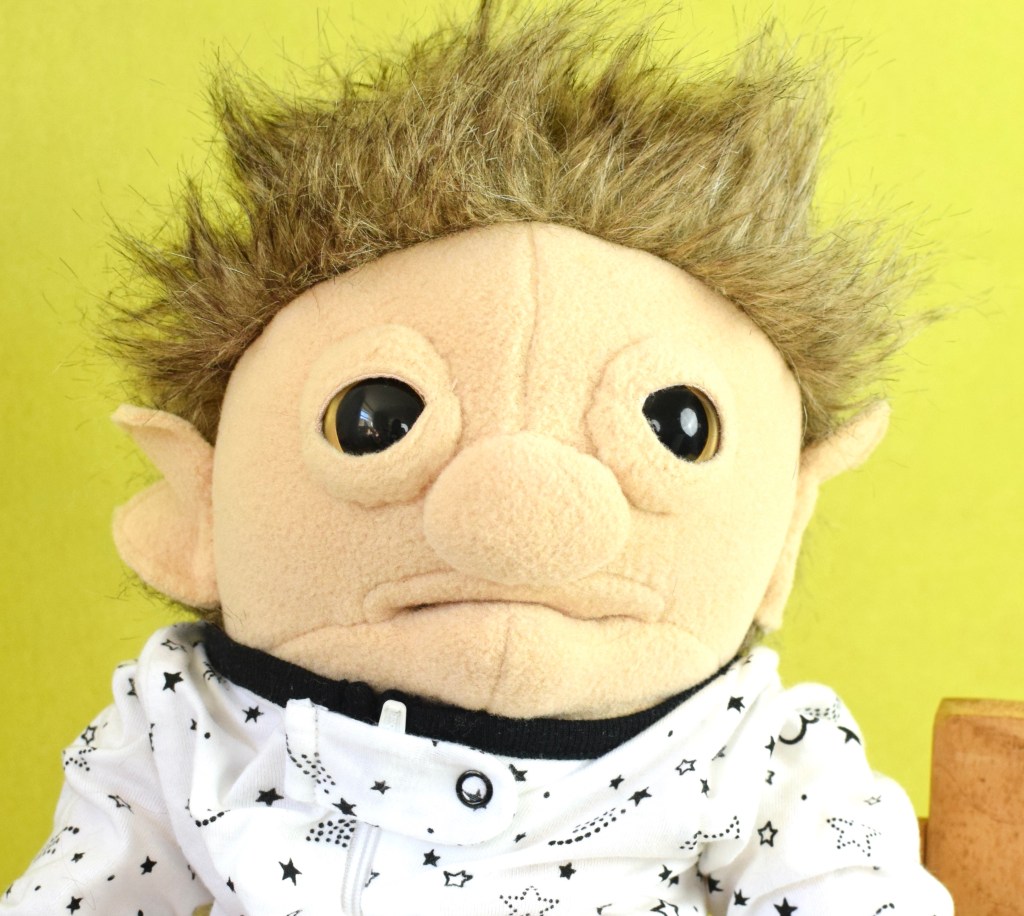
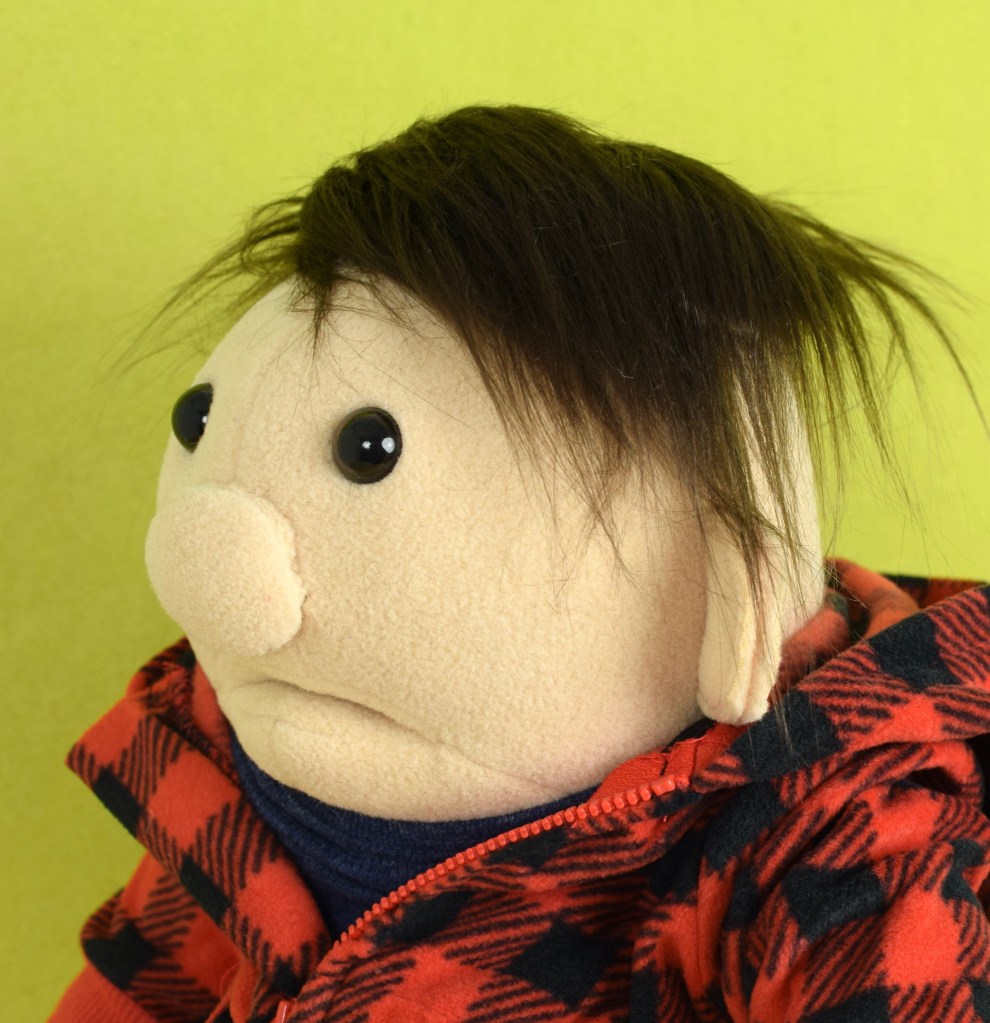
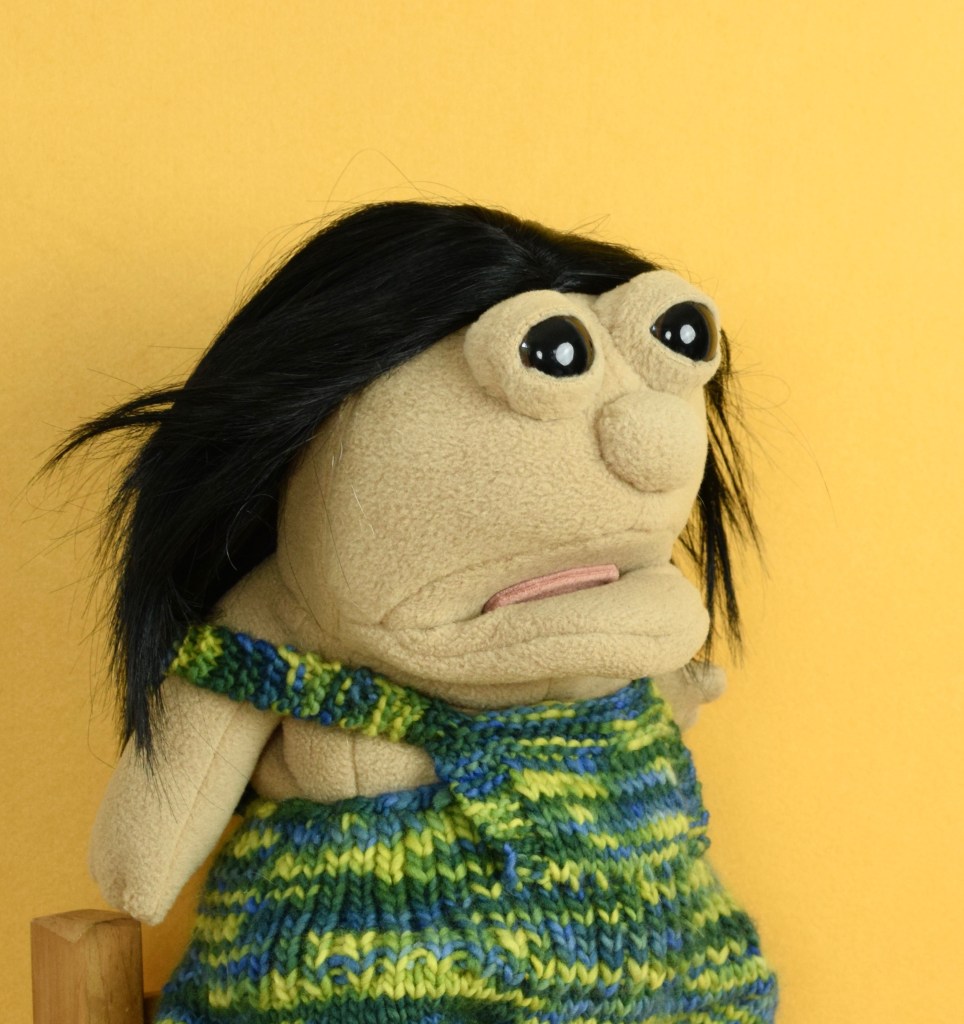
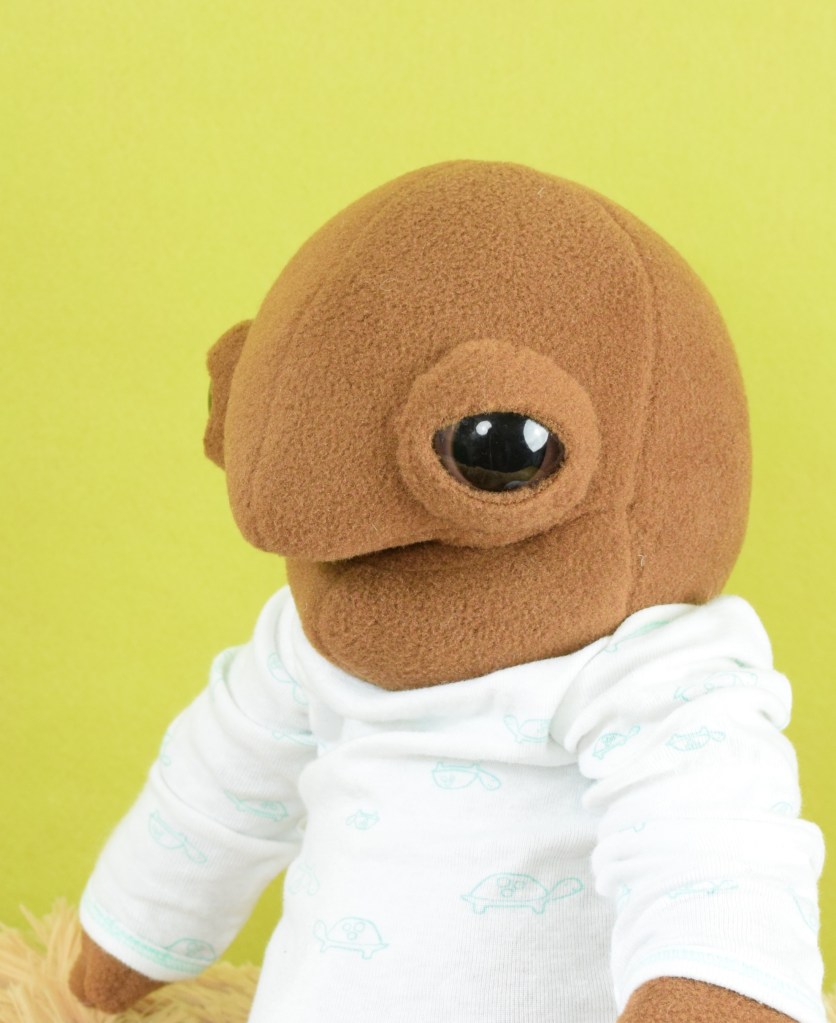
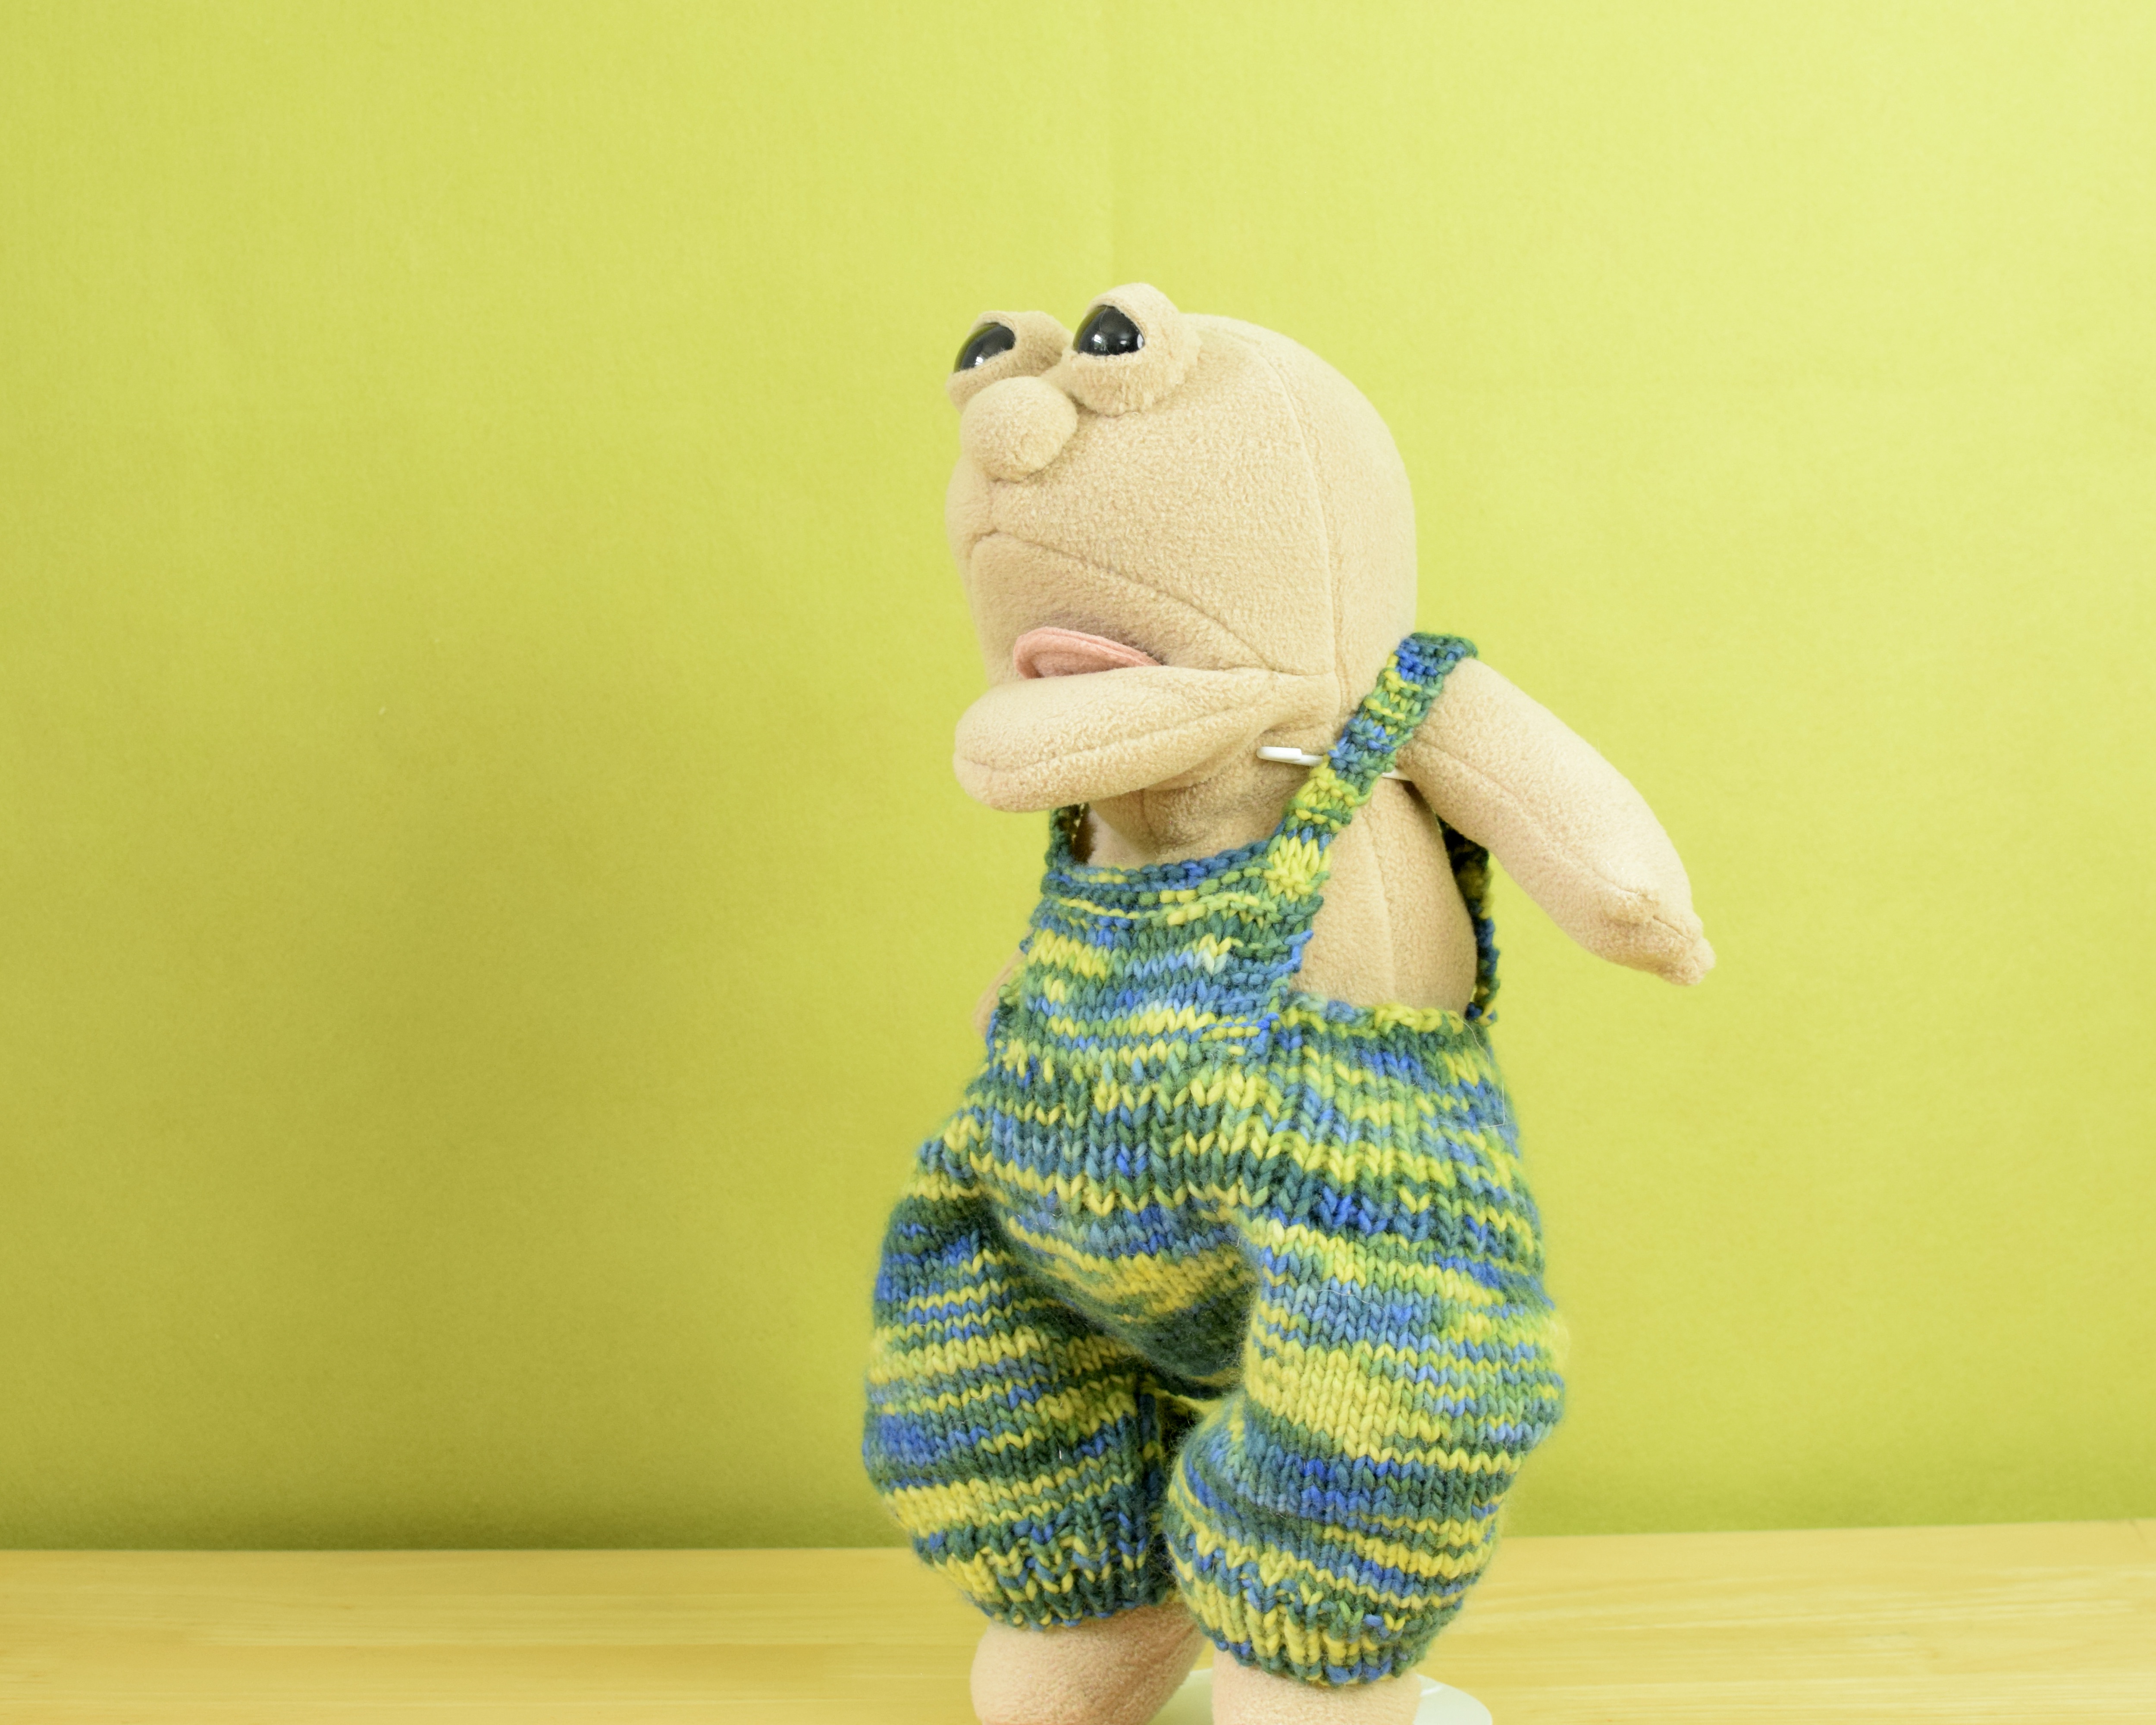
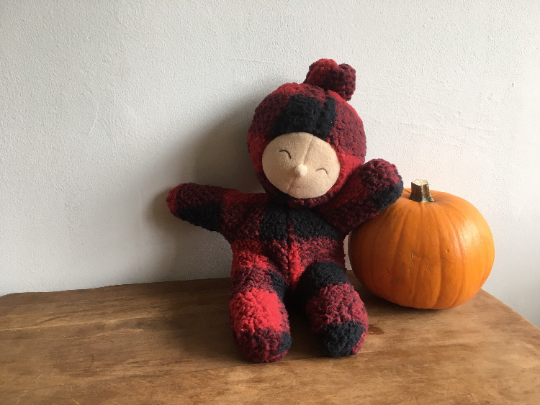
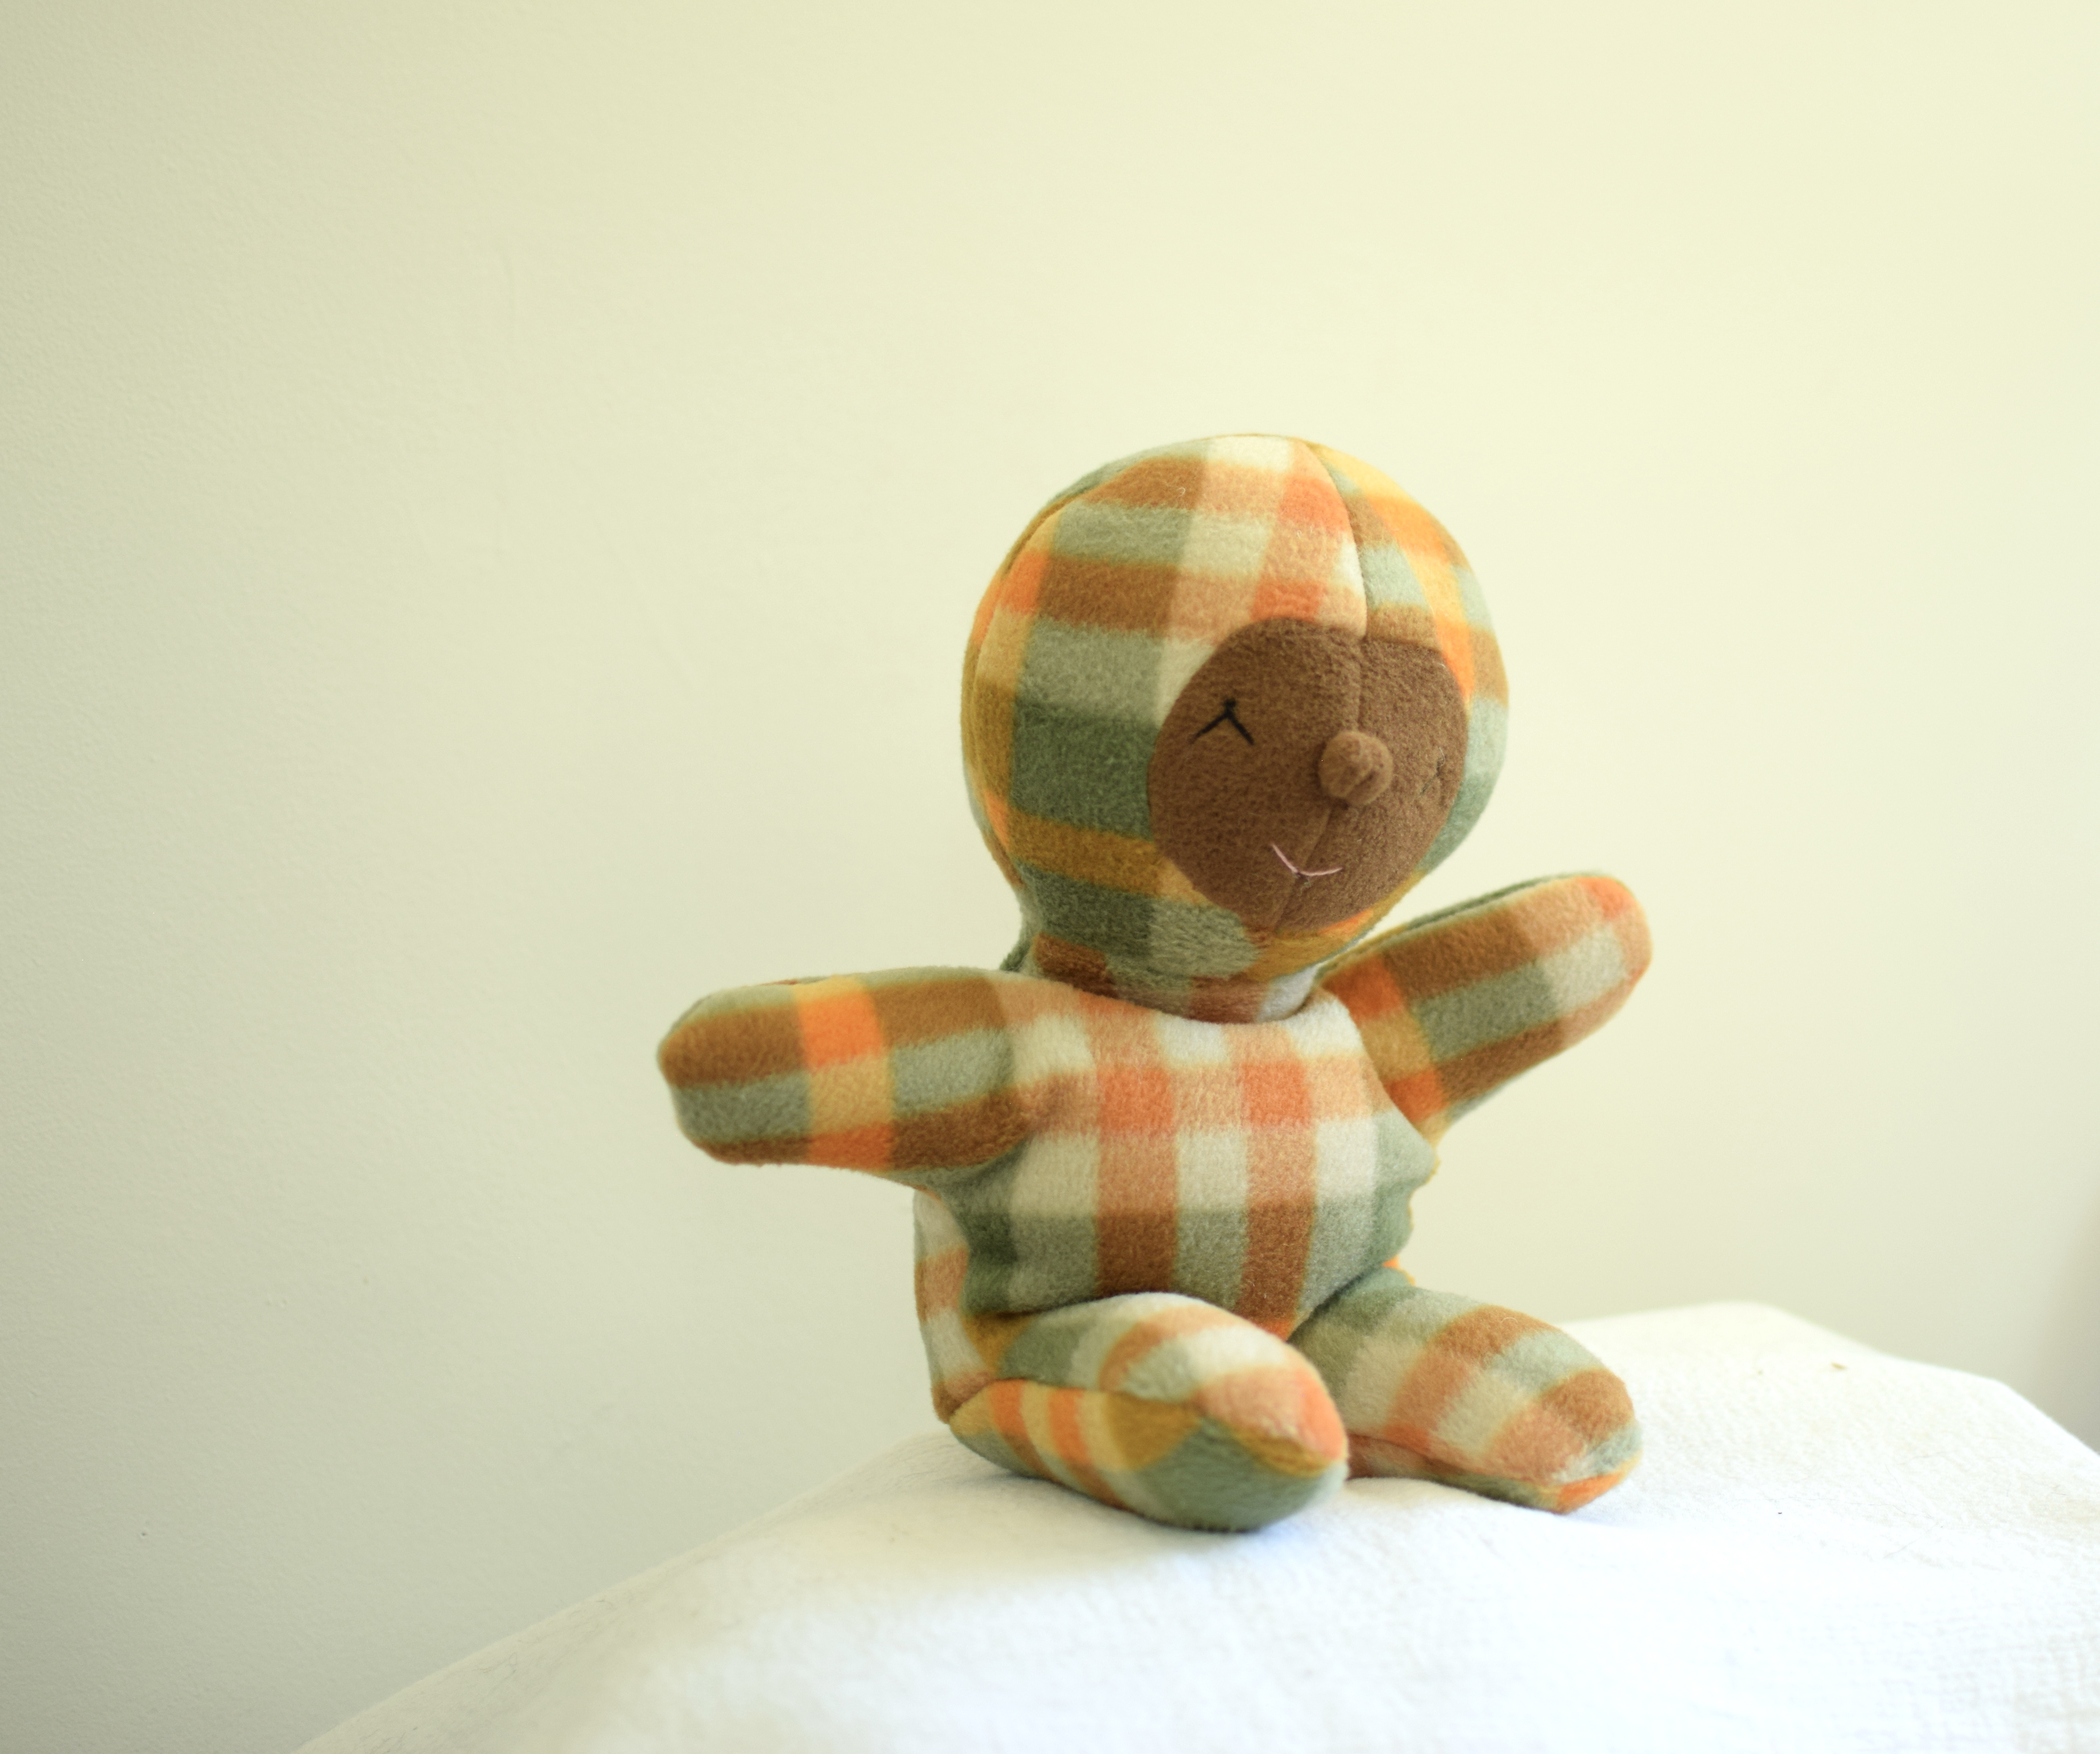
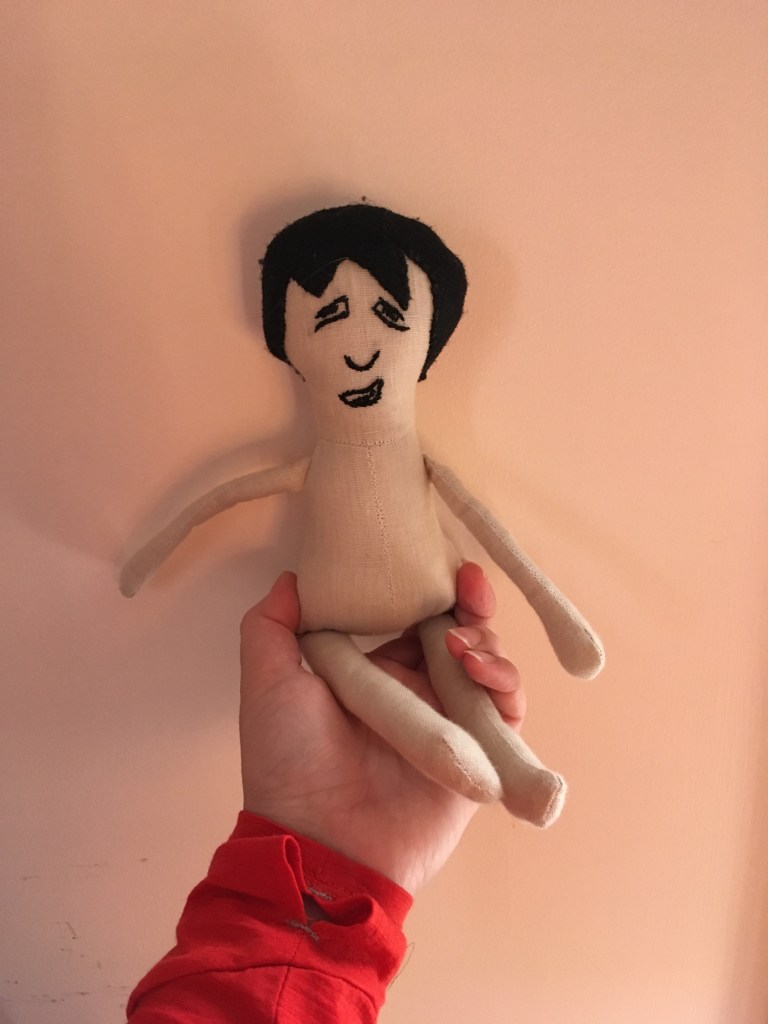
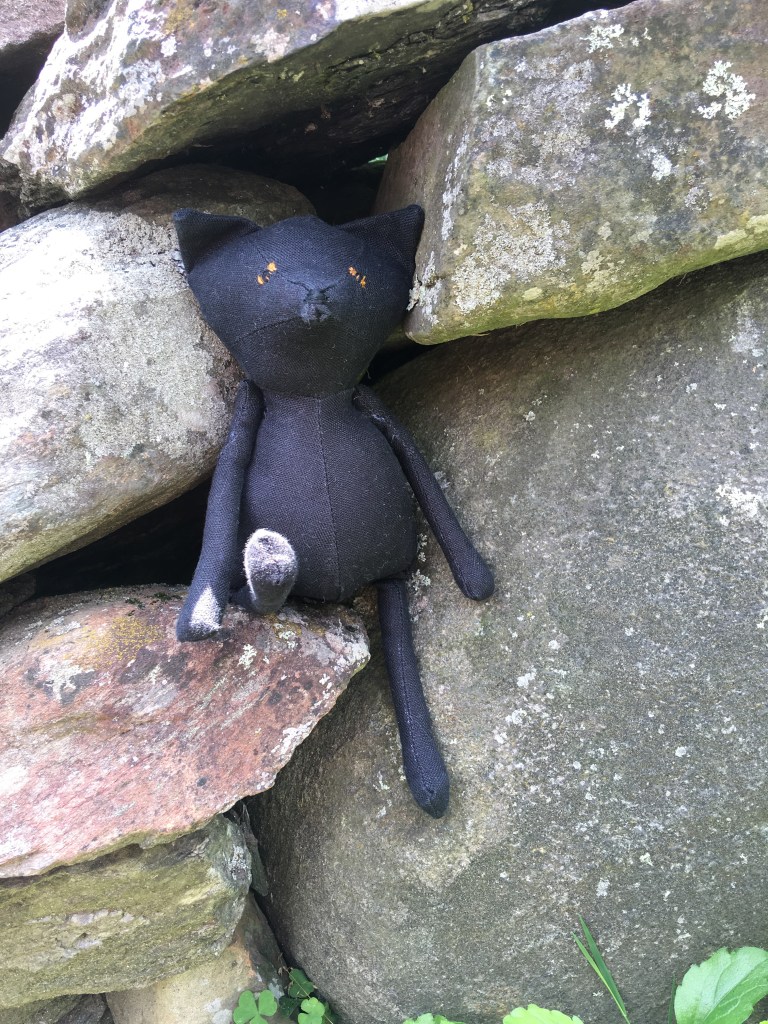
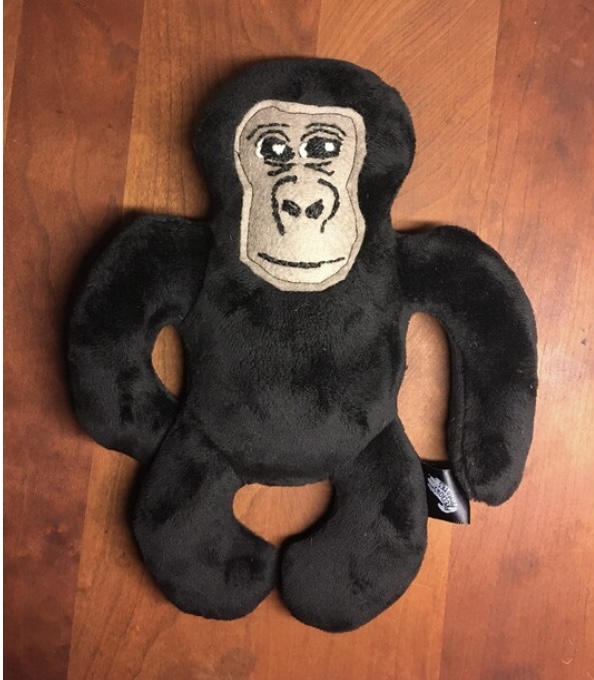
  6. Finally, 2D plush is great if you want to use embroidery, appliqué or other embellishments as the primary feature of your plush. I like usually like to communicate expression and facial and body shape through the patterning itself (3D) but sometimes it’s fun to use the fabric almost as a canvas where you embroider, appliqué fabric pieces or even paint on it. In this case you want a flat surface without extra seams so that you can easily use these techniques, perhaps even in an embroidery hoop, so 2D is perfect. All of the 2D plush pictured in this post have tons of embroidered expression (that is, if you can pardon the poor photo quality).

So there you have it: 2D plush has a lot of room for possibility while keeping the pattern-making and machine sewing aspect nice and simple. It also means that you can dive right in as a plush-maker newbie and familiarize yourself with the fundamentals of fabric choice, sewing, and basic patterning. What questions do you have?

Scooter

Creature Dolls

Another wonderful doll friend is also done: Scooter.

Since Sleeping Beauty has been viewed in my home roughly 1,353 times in the last two months (no complaints here, that movie rocks) I have been scheming to make a creature head pattern loosely inspired by Malificent’s goons. They’re essentially pig/warthog heads on humanoid type bodies.

I love his wrinkly snout and smile. I would like to make this again with an open mouth, and another time with a frown. I can play with inserting teeth, etc. Too much fun!

I decided to give him these elvin ears because it felt right.

Like his friend Willard, Scooter may have an auction rather than my typical Etsy listing format to allow more folks to have a chance to buy. Mailing list subscribers will get all of the details tomorrow!

Willard

Creature Dolls

Meet Willard.

I had wanted to make a new face pattern inspired by manatees. As I neared completion of this doll, I shared him on a reel as an example of one of my many (most) creatures with eyelids rather than just eyeballs.

Much to my surprise, the reel got more than a million views in less than a week and garnered a lot of attention and comments. It seems the larger internet community is divided as to whether Willard is scary or cute, and whether giving him eyelids did in fact supply him with a soul and personality as I contended it would. Additionally, many commenters felt that Willard ran anywhere on the continuum from sleepy, to burnt out from a soul sucking retail job, to sedated (which I assure was not my intention when creating this doll!) On the whole, people were immediately obsessed and found him sad and adorable which—hello!—he is. And he’s not the first of my dolls to be these things.

Anyway, it was quite the kerfuffle and Willard and I are exhausted! However, being an unintentional joke turned out to be a great way to reach many people who love these creatures and that was a wonderful way to wrap up 2022.

Since my shop drops were already becoming a bit of a skirmish for hopeful buyers, and given the increased interest in purchasing Willard, I will be trying an auction format this time around. Mailing list subscribers will get all of the details tomorrow.

Open Mouths for plush toys

Techniques

When plush toys have open mouths, it can really add to their personality, expression and play value. You can do an open mouth for a puppet or for a regular doll/plush. You can insert teeth or a tongue and make the mouth smiley or frowny.

There are a few different ways to make open mouth, and I am still refining my process. It does get a bit tricky when working with thicker fabrics, and the mouth lining can tend to pop out or thrust forward once stuffed. You can fix this by sort of tethering the inner mouth to the back neck or somewhere inconspicuous, but I am also working on some other techniques that I think will help with this.

Give this post a like if you would be interested in a more in-depth tutorial about drafting and sewing open mouths!

Puppetry

Creature Dolls, Uncategorized

This past winter, I decided to make my daughter a silly puppet. I had made my first fabric puppets using the Tuscon Puppet lady’s patterns a couple of years ago, so I had a general idea of how to do the mouth and was excited to try my own pattern. The result was a silly bird that we named Dody. My daughter seemed to enjoy talking to Dody and watching the her various hijinks. The puppet became like a member of the family. Although my daughter has also taken to other dolls and soft toys, the moving parts of a puppet and the tendency for the holder to want to animate them more, seems to create more of an impression than a regular soft toy.

I made several other puppets after that point. I spent a lot of time studying the commercially-made plush puppets my daughter had in order to determine how they were constructed. I figured out that there are two basic ways that the mouth liners can be made, and identified some basic construction choices that help make the open mouth functional yet compatible with the overall design.

Almost all of my recent creature dolls can be puppets with moveable mouths. I have made the mouth slightly open on some of my dolls, because it looks really cute, but I hadn’t made any with a full opening to use as a puppet.

For this puppet, I tried a new leg style on my baby creature pattern (normally I do a jointed leg) and I also set the arms in a little differently. I stabilized the mouth liners with foam interfacing and inserted a cotton liner so that the stuffing and insides are safe from your hand when its inserted. Although I am not sure I’d do this leg style for a regular doll since it’s not that flexible, it worked nicely for the puppet because the legs are stable but can also be forced down to sitting type position as you’re holding the puppet.

I also want to tinker with the mouth liner–the foam was a bit bulky. I may try something thinner, or perhaps line the inside of the mouth with the foam again but not have the foam also in the seam allowance.

I dressed this puppet in these adorable knitted overalls (adapted from pattern I purchased from Unique Knit by Caroline)–I had been saving this gorgeous Malabrigo yarn for YEARS and made a baby sweater and these pants, but never found the right doll for them. The pants fit this puppet perfectly and I made them into overalls to tie it all together.

My original vision for this puppet included a short, pageboy style wig but I think that both of these look adorable and hilarious. I love combining somewhat outdated/old looking wigs with these creatures.

I have always loved Folkmanis puppets, as well as my beloved Hosung monkey puppets, because they’re functional soft toys while also puppets. As much as I like more professional puppets, they’re made with a lot of glue and foam and really aren’t meant to double as a durable soft toy. I’m happy that I figured out how to make patterns that can be both. My experience with my daughter proved the amazing social-emotional and educational potential that puppets have–so this is a big incentive for me to make them.

Happy, Simple Dolls and Critters

Everybuddies PDF Patterns, Soft Toys and Dolls Discussion, Uncategorized

I had been working on digitizing my Bunting Doll pattern (below) to sell in my Everybuddies pattern shop when I got the idea to also do this pattern as a furry critter and/or monster pattern. I used the same pattern but added floppy ears and did the face embroidery differently and ended up with this sweet puppy.

I loved how it turned out but also realized that the number of seams and pieces in this pattern make it a bit of a challenge to sew up in plush fabric. This isn’t a surprise as I tend to over design at times, making more seams than necessary. I decided to simplify the pattern and worked up these person, monster and teddy dolls using the simplified version. I kept the body/rear structure as this allows the doll to sit on its own–something that I think sets these dolls apart from most plush which are just two identical body pieces sewn together.

This new version is much easier to sew up with difficult faux fur, and also shows off the pattern of the fleece better without a center front seam. I also made a version with the face partially on the fold so that there is no center seam in the middle of the face (for the human versions, I still keep the seam because that allows me to get that button nose).

I love to make complicated, challenging patterns, but I also like to challenge myself to simplify. The nice thing about having simpler patterns is that they take less time to work up and, in many ways, they offer more options. I find it a productive design challenge to make something that’s better for its simplicity, where the simplicity is the strength, rather than the simplicity coming across as an outcome of the designer’s limitations. This is more challenging than making something that’s very detailed/realistic/technical.

The bear has sold but the puppy, monster and plaid doll are available in my Etsy shop.

Unlikely Favorites

Soft Toys and Dolls Discussion

Both these dolls were some of my early experiments in soft toy making.

I’m happy with the fox, but I made him in super cheap polyester felt because I didn’t want to spend a lot of money on nice materials for my prototype. So, he hasn’t worn very well and has a lot of pilling. I named him Gary the Arctic fox and made up a jingle: “He’s the Arctic Fox with nary a care, cuz it’s Gary O’Clock somewhere.” My husband added another verse: “Time stops for no man, but the clocks point to this fox.”

I’m also happy with this human doll pattern and its hair, but the face is obviously a total disaster. There are so many problems with the embroidery I’m not even sure where to start. So it’s a pretty strange doll. It looks flustered.

Anyway, both dolls were helpful to test out my patterns and then I sort of tossed them in the toybox. But recently they’ve both been getting a lot of use from my three-year-old.

As I watch her play, I realize that a major reason she likes them so much is that their legs and arms move. One of her favorite games is to make them “walk” along the edge of the couch and then fall to their death (and then, spring back to life and claw their way back up the couch ala The Exorcist).

It’s also easy to hold them with one hand and manipulate the arms in different ways–to clap, wave, shake, etc. Because the arms and legs are stuffed so firmly yet attached so that they’re floppy, they’re really fun to play with. They’re also supremely “fling-able” and fun to flick around by one arm.

My daughter could care less about their features or the poor felt quality. She isn’t bothered by their nakedness. Other children with finer tastes might feel differently. But it’s been an interesting lesson for me in terms of function and beauty being in the eyes of the beholder.

Adult dollmakers often make very fussy, fancy dolls. Dolls that, at 12″, have wardrobes that definitely cost more than mine (we’re talking Liberty of London fabric and mohair sweaters…). These dolls are beautiful and swoon-worthy but there’s something to be said about a doll that really only serves the child, like these little weirdos.

I’d like to make some more of these simple rag dolls. I do think they need clothing, but it doesn’t have to be fancy.

Here are some of Gary’s fox doll cousins (Terry and Larry), in (left) linen and (right) up-cycled wool fabric.